Arch V1.1
Introduction
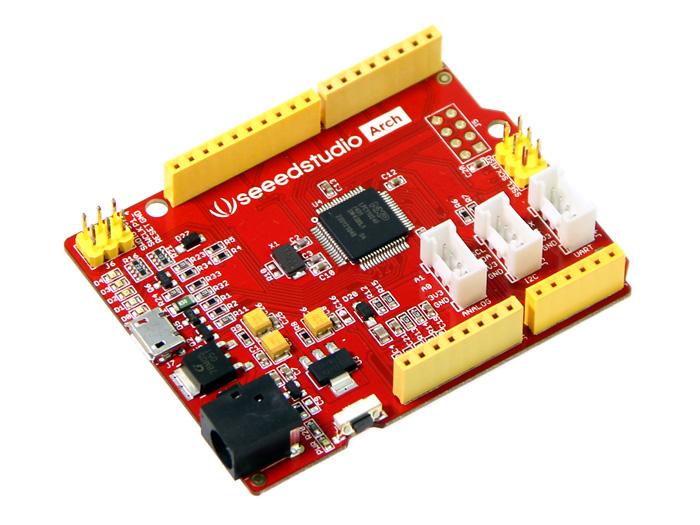
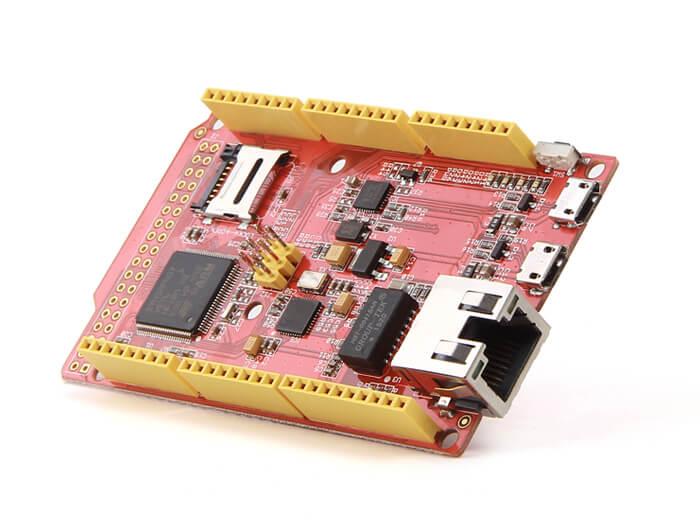
Arch V1.1 is an mbed enabled development board with Arduino form factor and Grove connectors for rapid prototyping. With a variety of Shield and Grove modules, mbed SDK and lots of software libraries, you can rapidly build a prototype.

Version Tracker
| Seeeduino Arch V1.0 |
| 2013-6-17 |
| Arch V1.1 |
|
Features
- mbed enabled
- online development tools
- easy to use C/C++ SDK
- lots of published libraries, projects
- Arduino form factor, three Grove connectors
- available with 3.3V compatible shields
- a large number of grove modules
- Drag-n-drop programming
- NXP LPC11U24 MCU
- Low power ARM Cortex-M0 Core
- 48MHz, 32KB Flash, 8KB RAM, 4KB EEPROM
- USB Device, 2xSPI, UART, I2C
Specifications
| Item | Typical |
|---|---|
| Work Voltage | 7 ~ 12V |
| Microcontroller | LPC11U24 |
| Flash Memory | 32KB |
| EEPROM | 4KB |
| RAM | 8KB |
| UART | 1 |
| I2C | 1 |
| ADC Channels | 8 |
| I/O pins | 40 |
| Digital I/O Max input voltage | 5.0V |
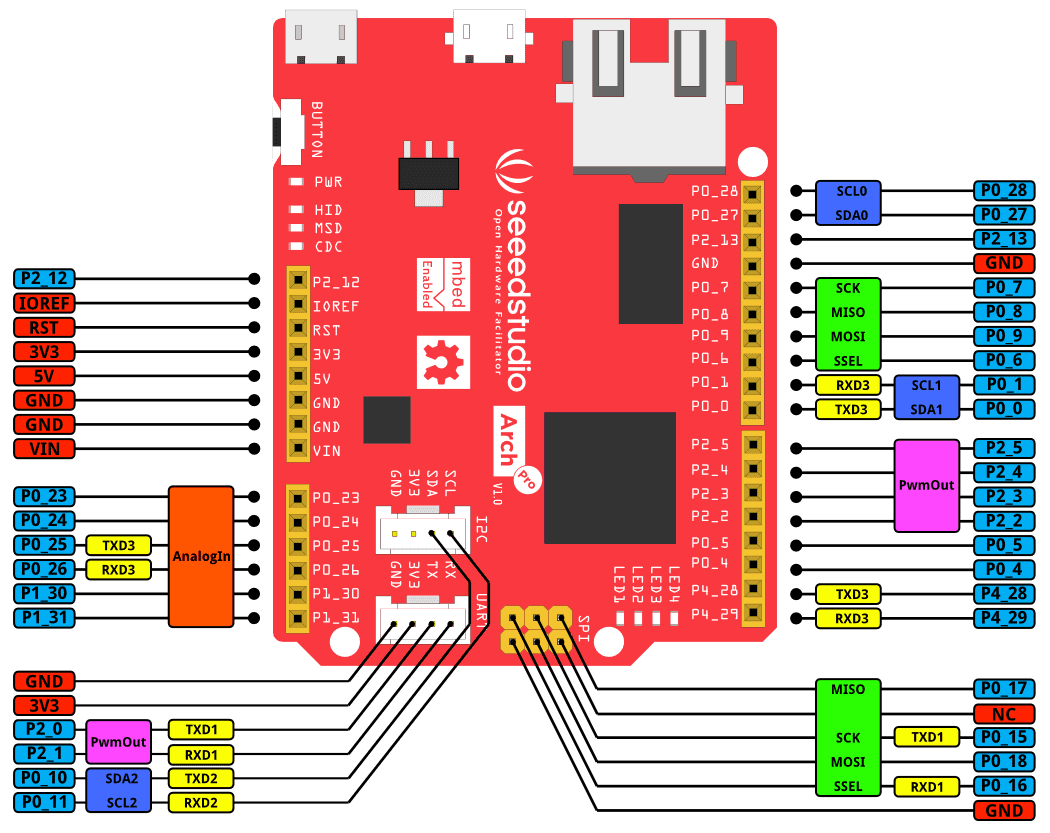
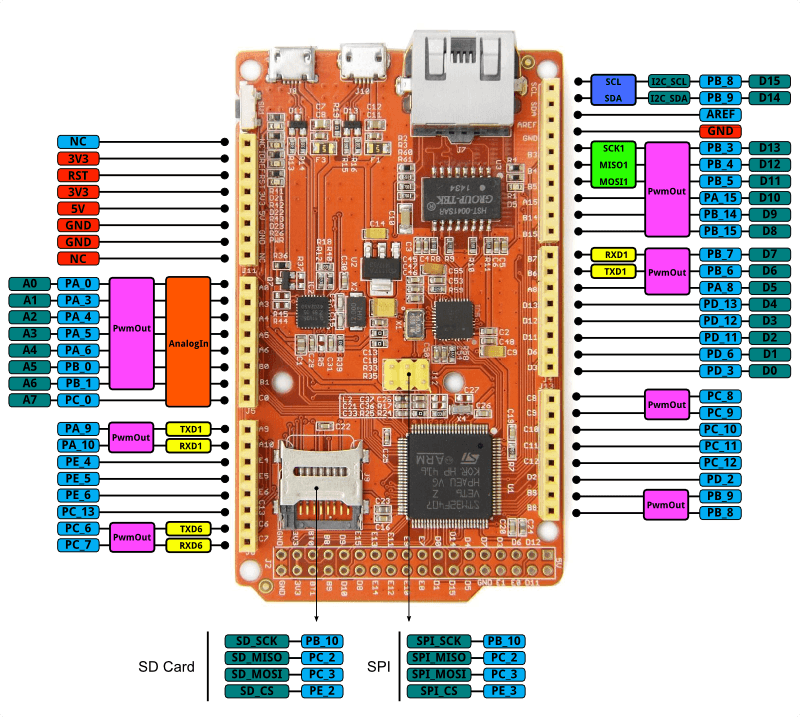
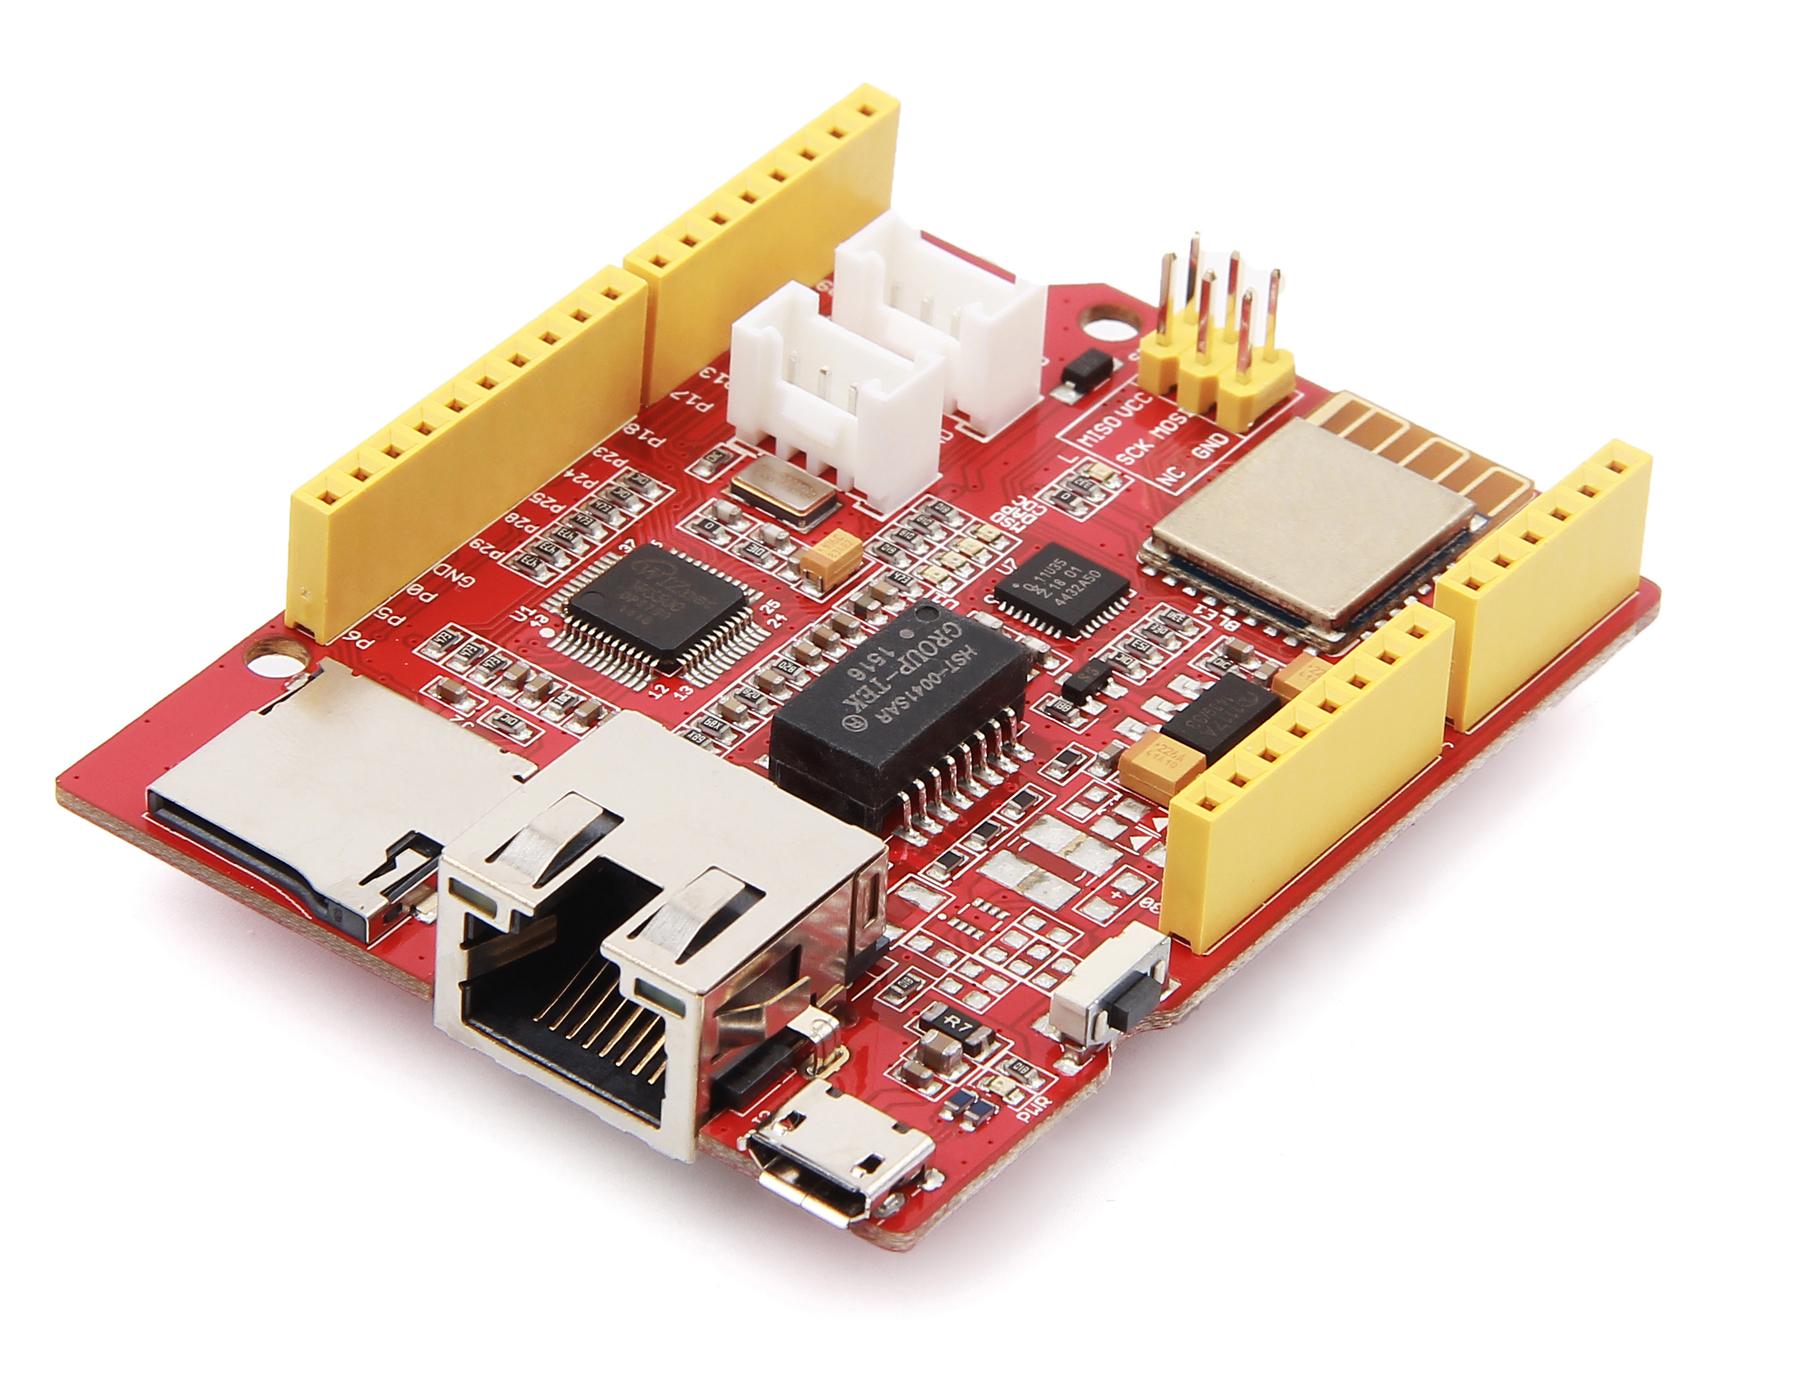
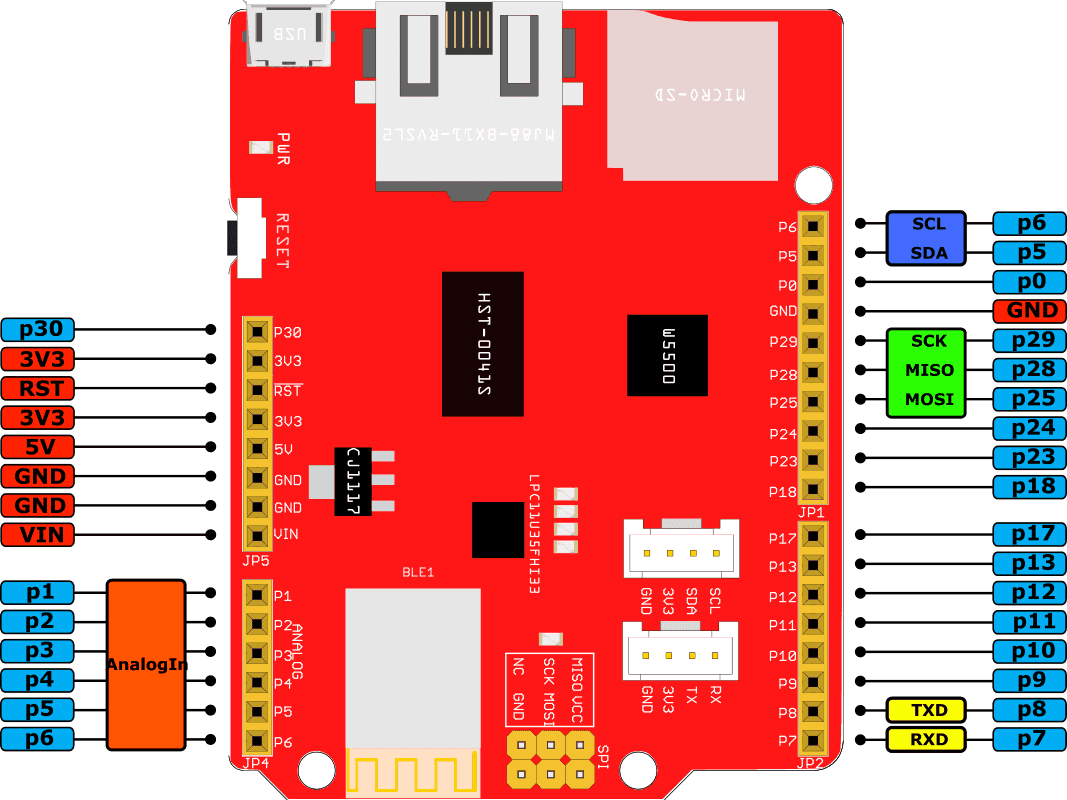
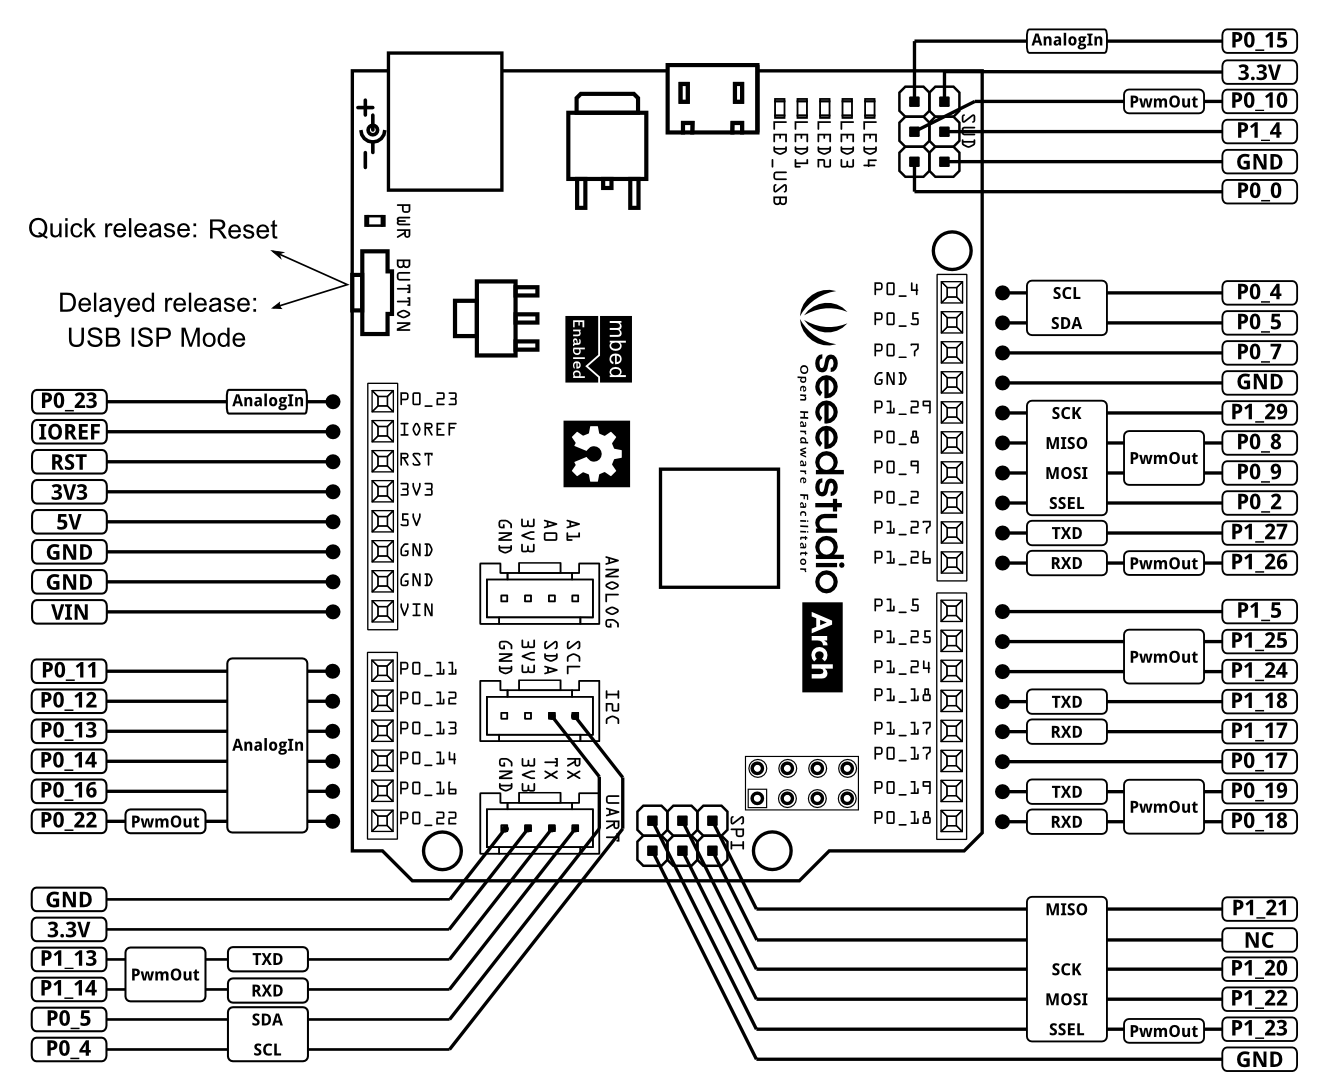
Hardware Overview
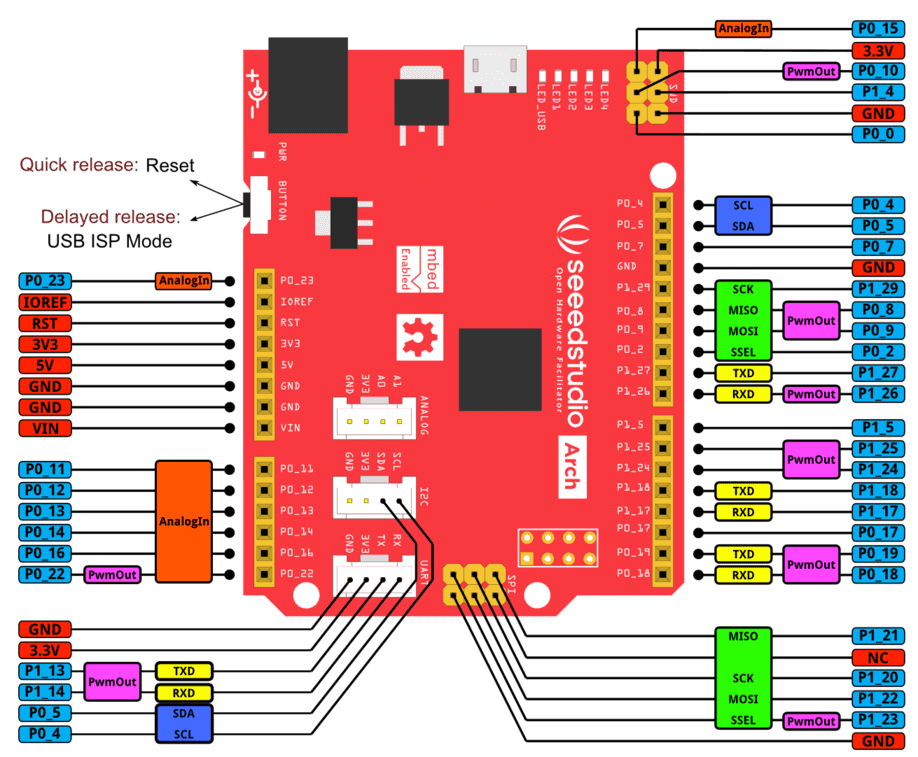
There is a monochrome version for you to print.
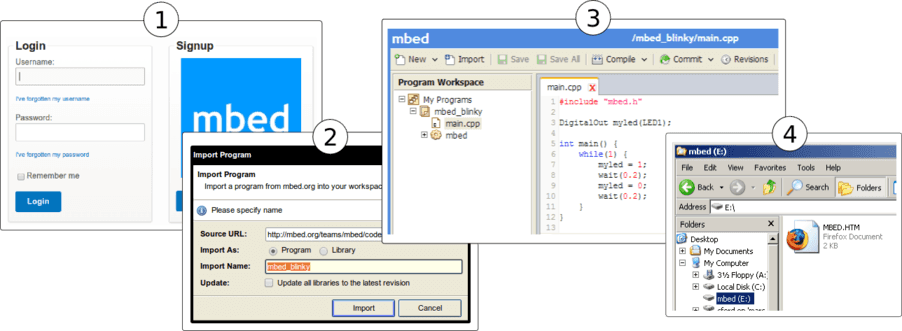
Get Started
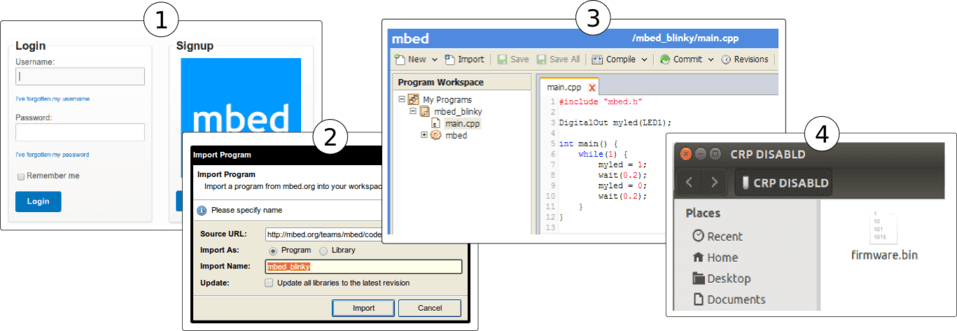
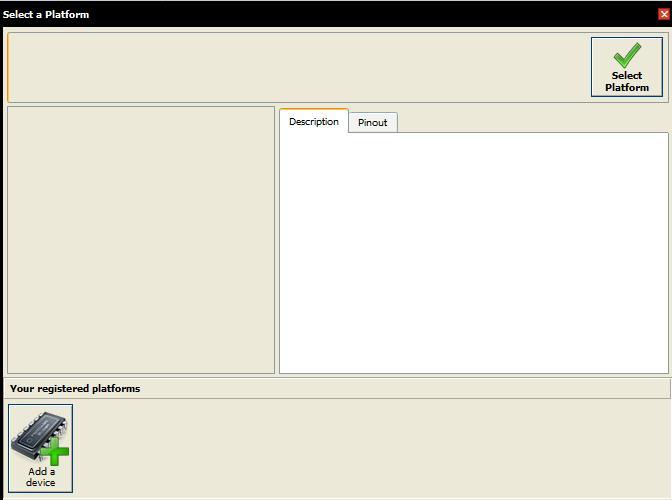
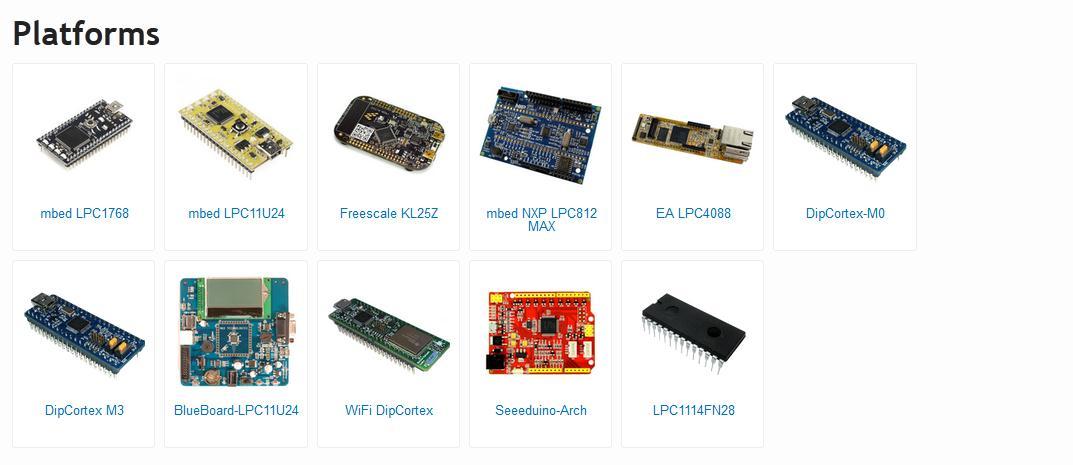
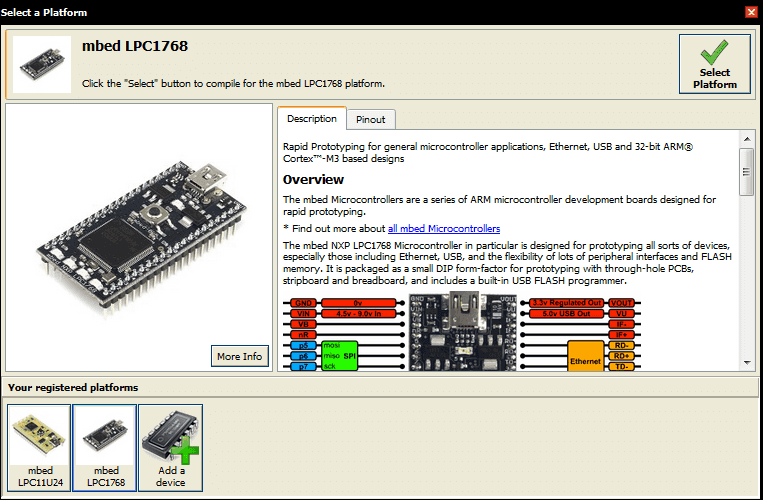
- Click this link to login or signup to mbed
- Import the mbed_blinky program
- Coding! Then you can compile the code and download the output binary.
- Now connect your Arch board to your pc and long press the reset button, it will automatically appear as a USB driver named CRP DISABLD. Go to the CRP DISABLD, delete the firmware file and copy the download binary file to CRP DISABLD. Quick press the reset button to run the new binary.
You can change the code as following and try again.
    #include "mbed.h"

    BusOut leds(LED1, LED2, LED3, LED4);

    int main() {
        uint8_t count = 0;
        while(1) {
            leds = count++;
            wait(1);
        }
    }
Programming Arch on Windows, Linux or Mac
Arch does not have an mbed interface. It uses USB In-System-Programming(ISP) to upgrade the firmware.
To enter the USB ISP mode, connect the Arch with your computer and long press its button, and then a disk named “CRP DISABLD” will appear.
- On Windows
- delete firmware.bin in the “CRP DISABLD” disk.
- copy a new firmware into the disk.
- On Linux
- if the disk is not mounted, mount the disk at {mnt_dir}
- dd if={new_firmware.bin} of={mnt_dir}/firmware.bin conv=notrunc
- On Mac you will need to use Terminal to run the following script to copy you’re .bin file to your Arch
- dd if={new_firmare.bin} of=/Volumes/CRP\ DISABLD/firmware.bin conv=notrunc
If you are so inclined, you can also create an Automator application to support drag-and-drop of the file to your board. Just create a “Run Shell Script” with the following command:
dd if=$* of=/Volumes/CRP\ DISABLD/firmware.bin conv=notrunc
You will also need to change the
"Pass Input" option from "to stdin" to "as arguments"–without this you will get an error "The action 'Run Shell Script' encountered an error" or "dd: no value specified for if (1)" in the log.
Also, an improved form of the script is:
dd if="${1}" of=/Volumes/CRP\ DISABLD/firmware.bin conv=notrunc
Which should handle spaces in the file path and only uses the first file supplied.
Quick press the button to run the new firmware.
Applications
- Use Seeeduino Arch as a debug adapter to debug another Seeeduino Arch
- Sense environment
- Play with Grove RTC
- Play with Grove - Ultrasonic ranger
Resources
Help us make it better
Thank you for choosing Seeed. A couple of months ago we initiated a project to improve our documentation system. What you are looking at now is the first edition of the new documentation system. Comparing to the old one, here is the progresses that we made:
- Replaced the old documentation system with a new one that was developed from Mkdocs, a more widely used and cooler tool to develop documentation system.
- Integrated the documentation system with our official website, now you can go to Bazaar and other section like Forum and Community more conveniently.
- Reviewed and rewrote documents for hundreds of products for the system’s first edition, and will continue migrate documents from old wiki to the new one.
An easy-to-use instruction is as important as the product itself. We are expecting this new system will improve your experience when using Seeed’s products. However since this is the first edition, there are still many things need to improve, if you have any suggestions or findings, you are most welcome to submit the amended version as our contributor or give us suggestions in the survey below, Please don’t forget to leave your email address so that we can reply.
Happy hacking


