What is the command to capitalize only the first letter of each word entered into a text field?
--
possibly (in pseudo code) if length textbox1.text = 1 then upcase textbox1.text
that gives you the first word typed. to get successive 'first' letters, you may have to keep track of the spaces and write a routine to capitalize the first letter after a space.
try it, it might work. Did it work?
--
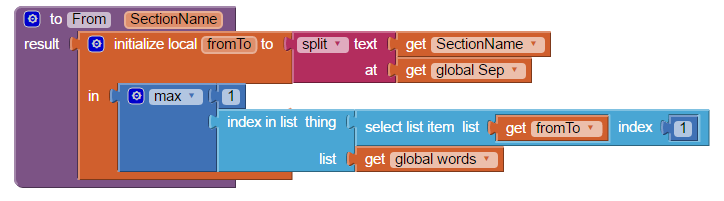
If you are expecting multiple words, separated by spaces,
run a counter i from 2 to the length of the string, to locate each letter
for the segment block.'
Use a for loop for that.
Capitalize the letter at position i if the letter at position i-1 is blank.
Also capitalize position1, the special case outside the loop.
Check your text block drawer for upshift or capitalization blocks,
and for the block that lets you replace text in a string.
--
I’m new to all this, and I barely know how to use the blocks that the App Inventor site provides us. Will you be able to explain in simpler terms? Or perhaps which blocks I should use?
--
nice example...
but if your purpose was to keep the blocks simpler, you should have chosen a local variable instead...
--
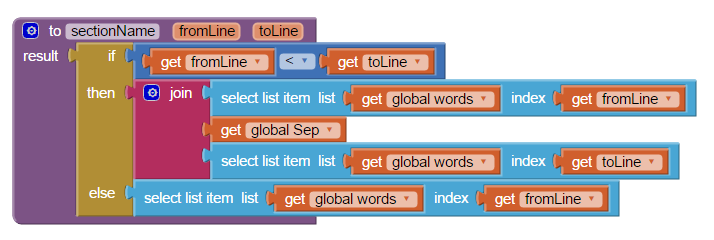
How do I create the purple command box (“call capitalize text”) that you laid out on your site? I can’t find it on AI.
--
Read this: AI2 Procedures
Try some of the blocks. Clicking the blue icon with a right click exposes additional properties. You name the procedure by typing over the words in the where it says procedure. ..and yes, do some of the tutorials as suggested by Hossein; this method to create special blocks is explained in one of them.
--
Could you tell me what I'm doing wrong?
--
Your result is cap and not text
--
See the updated post that now includes explanation of blocks: Tips&Tricks – Capitalizing 1st Letter of Every Word
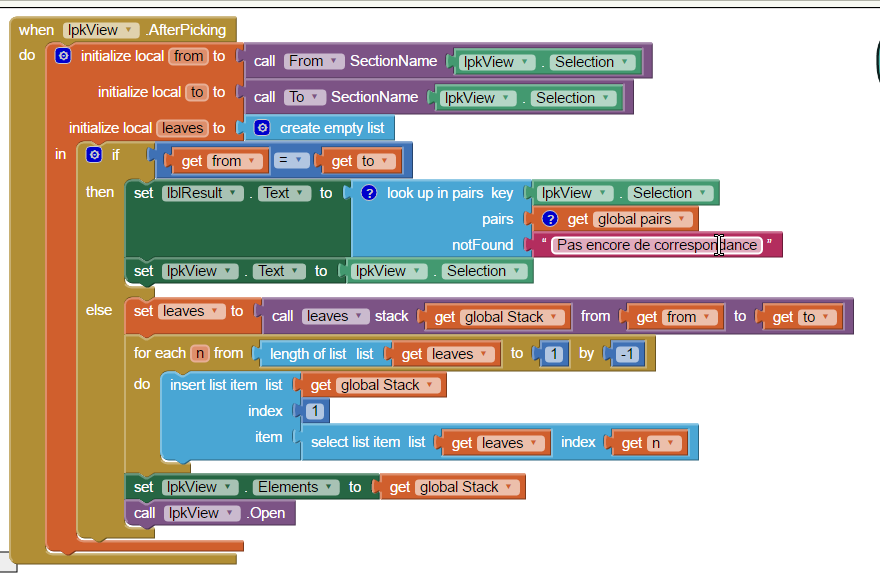
Will you please explain the arrow you drew?
--
If you are trying to duplicate Hossein's code exactly ... the arrow shows where your code is different from Hossein's blocks.
The block above split at spaces is initialize local cap to in one instance and set global varTemp to in the other instance (your code) .. this is where possibly you too should have the s initialize local cap to block.
Is this your mistake, or do you want to do what you did. I do not know, just wanted to point out the difference between the code blocks in the example and your code (ignoring the variable names you introduce.
--
as already said, use cap instead of text
--
Thanks, everyone. You helped me find what I was doing wrong, and I figured it out.
You all are the best.
--
I read one of the items on the checklist to publish my app, and it was to have it tested out before it goes up on Google Play. Since all you gentlemen were patient and kind enough to help me build my very first app, I was wondering if you all would like to test it and to provide feedback.
--