2017년 1월 16일 월요일

App Inventor Glossary


See Also: App Inventor Concepts
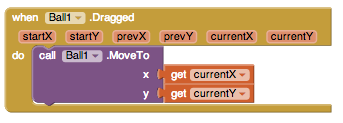
Argument

Often in Computer Science, the inputs to procedures or events are called arguments. These arguments are local variables whose scope is inside that procedure or event.
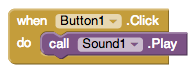
Behavior

An app is said to have behavior. An app's behavior is how the app responds to user initiated and external events.
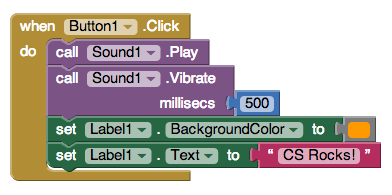
Block

App Inventor is a blocks programming language. Blocks are the pieces you connect together to tell your app what to do. They can be found in the Blocks Editor.

Blockly

Blockly is the name of the visual programming editor that App Inventor uses to make the blocks in the browser.

Blocks Editor

The screen found by clicking the Blocks button on the design screen. This is where you tell your app what to do.

Comment

Comments allow you to write reminders or quick remarks on blocks of code. You can use them to explain what certain blocks do or what you want to do later on. As comments are not run, they are for the user and not for the computer. Using comments can allow you or others to better understand your code when you come back to it later on. You can add or remove a comment by right-clicking on a block.
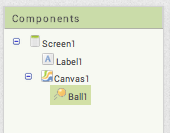
Component

Components are the pieces of your app that do actions for you. On the design screen, components are dragged from the Components Palette and placed on the phone. Examples of components are Label, Sound, or Button.

Designer

The screen where you can drag and drop component pieces and design them using the User Interface.

Drawer

The second box in the hierarchy of blocks that goes Palette to Drawer to Block. An example of a drawer is Control.
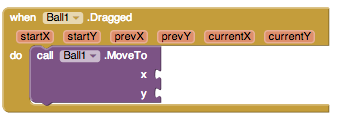
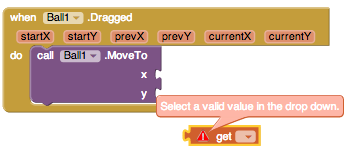
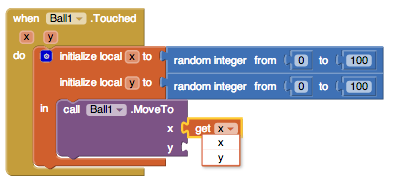
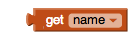
Some blocks have a small dropdown arrow to the right of the name of the block. You can click on this arrow to change the name and function of the block. The get block is an example of a dropdown. For more help on this topic, check out the dropdowns page.

Emulator

The name of the fake phone that appears on your computer if you don't have an Android device to work with is an emulator.

Event Driven

We say that an app is event driven because it depends on events to know what to do. You don't tell your app to wait until a text message before doing something else. Instead, by using event handlers, you tell your app that when an event occurs, perform this task. This prevents your phone from spending tons of time waiting for events to happen while stopping everything else to wait. With event handlers, the phone can continue to do what is was assigned to do unless an event handler interrupts. We say that the flow of the program is determined by events.
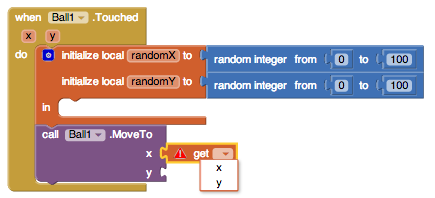
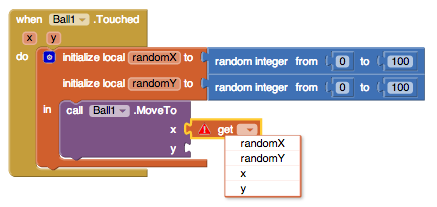
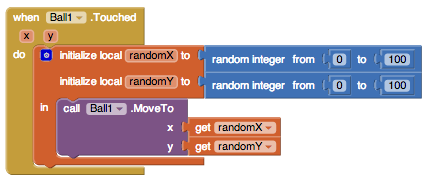
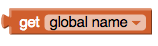
Getter

A Getter is the block found in the Variables drawer that says get with a dropdown next to it. This block is used to return a local or global variable.

List

Lists are used to store information. If you wanted to keep track of all of the usernames of people who use your application, you would want to store that information in a list. When items are added to a list, they are placed in a certain position in the list. The position of an item in a list is often called its index. In App Inventor, the first item in a list has an index of 1, the second has an index of 2, and so on.
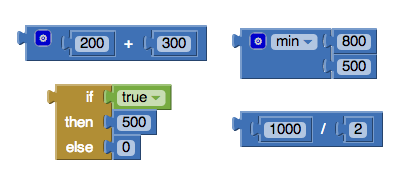
Mutator

Some blocks have a white plus sign on them in a blue box. These blocks are called mutators. If you click on the plus sign, a bubble pops up with the block on the left representing your function and all of its inputs and the block on the right with the name of one of the inputs. You can drag this input block into the function block and then your function block will now take an additional input. List and max are examples of mutators. For more help on this topic, check out the mutators page.

Palette

The broadest/outer most box that holds drawers.

Procedure

A procedure is a set of instructions. In App Inventor, a procedure is a set of blocks under a procedure block. For more help on this topic, check out the procedures page.
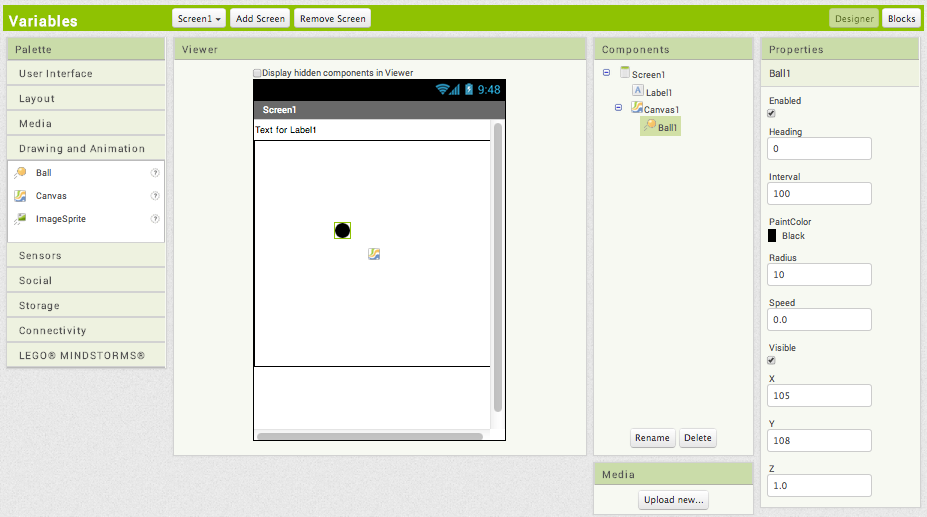
Properties

Every component has properties that can be changed or initialized on the Designer screen under the Properties which are located on the right hand side. They can also be changed or used in the Blocks view by using getter or setter blocks for properties. These blocks will say something like get/set Button1.Height.
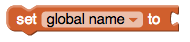
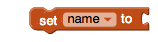
Setter

A setter is another block found in the Variables drawer that says set dropdown to. This block is used to assign new values to both local and global variables.
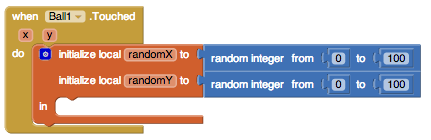
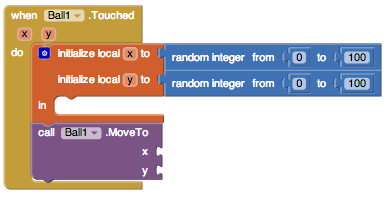
Variable

A variable is container that holds a value. There are two types of variables: global and local. For more information on this topic, check out the Global vs Local Variables page.

Important Concepts in App Inventor 2


There are several concepts in App Inventor that are important to know. The list of topics is below.


Commands and Expressions

When an event handler fires, it executes a sequence of commands in its body. A command is a block that specifies an action to be performed on the phone (e.g., playing sounds). Most command blocks are purple in color.
The Play block is an example of a command in HelloPurr:
Some commands require one or more input values (also known as parameters or arguments) to completely specify their action. For example, call Sound1.Vibrate needs to know the number of milliseconds to vibrate, set Label1.BackgroundColor needs to know the new background color of the label, and set Label1.text needs to know the new text string for the label. The need for input values is shown by sockets on the right edge of the command. These sockets can be filled with expressions, blocks that denote a value. Expression blocks have leftward-pointing plugs that you can imagine transmit the value to the socket. Larger expressions can be built out of simpler ones by horizontal composition. E.g., all of the following expressions denote the number 500: 
Commands are shaped so that they naturally compose vertically into a command stack, which is just one big command built out of smaller ones. Here's a stack with four commands:
When this stack of commands are placed in a body of an event handler (e.g., the when.Button1.Click event handler), the command will be executed from the top to the bottom. If the stack of commands above is executed, then the phone will first play the sound, then vibrate, then change the label's color to be orange, and then label will show the text "CS rocks!" However, the execution works very fast: you would see all the actions happen at the same time.

Control Flow

When an event handler fires, you can imagine that it creates a karaoke-like control dot that flows through the command stack in its body. The control dot moves from the top of the stack to the bottom, and when it reaches a command, that command is executed -- i.e, the action of that command is performed. Thinking about control "flowing" through a program will help us understand its behavior.
The order of the commands, or the control flow is important when you make an app. You need to make sure which action should come first.

Arranging Components on the Screen

App components are organized vertically by default. In the Designer palette, using HorizontalArrangement and VerticalArrangement can allow you to change the organization of your components.

Manipulating Component State: Using Getters & Setters

Every component is characterized by various properties. What are some properties of a Label component? The current values of these properties are the state of the component. You can specify the initial state of a component in the Properties pane of the Designer window. App Inventor programs can get and set most component properties via blocks. E.g., the example in the "Commands" section above shows blocks for manipulating the state of Label1.
Getter blocks are expressions that get the current value of the property. Setter blocks are commands that change the value associated with the property. Some Label properties cannot be manipulated by blocks. Which ones?

Programming Your App to Make Decisions: Using Conditional Blocks

Sometimes you may want your app to perform different actions under different conditions. If you were making an app to hold all of the hours worked in the current week, you would need to test what day of the week it is to know where to store the hours.
To implement this in to your app, you would need to use conditionals. Conditionals refer to expressions or statements that evaluate to true or false.

Testing Conditionals with if and ifelse blocks

App Inventor provides two types of conditional blocks: if and ifelse, both of which are found in the Control drawer of the Built-In palette.
You can plug any Boolean expression into the “test” slot of these blocks. A Boolean expression is a mathematical equation that returns a result of either true or false. The expression tests the value of properties and variables using relational and logical operators such as the ones shown in the figure below:
For both if and ifelse, the blocks you put within the “then-do” slot will only be executed if the test is true. For an if block, if the test is false, the app moves on to the blocks below it. If the ifelse test is false, the blocks within the “else-do” slot are performed.

Example

Get picture of blocks and write example using ifelse, booleans,expression, etc.
For additional help on this topic, check out Chapter 18 from App Inventor: Create your own Android Apps by Dave Wolber, Hal Abelson, Liz Looney, and Ellen Spertus.

Events and Event Handlers

Apps are event-driven. They don't perform a set of instructions in a pre-determined order, instead they react to events. Clicking a button, dragging your finger, or touching down on the screen are all events.
With App Inventor, all activity occurs in response to an event. Your app shouldn’t contain blocks outside of an event’s “when-do” block. For instance, the blocks in the figure below don’t make sense floating alone.
As events occur, the app reacts by calling a sequence of functions. A function is anything you can do to or with a component such as setting the background color of a button to blue or changing the text of a label. We call an event and the set of functions that are performed in response to it: an event handler.
Events can be divided into 2 different types: user-initiated and automatic. Clicking a button, touching or dragging the screen, and tilting the phone are user-initiated events.Sprites colliding with each other or with canvas edges are automatic events.
For additional help on this topic, check out Chapter 14 from App Inventor: Create your own Android Apps by Dave Wolber, Hal Abelson, Liz Looney, and Ellen Spertus.

Using Multiple Screens in One App

In App Inventor, you can have one screen open a second screen. Later, the second screen can return to the screen that opened it. You can have as many screens as you like, but each screen closes by returning to the screen that opened it. The screens can share information by passing and returning values when they open and close.
Building an app with multiple screens is a lot like creating several individual apps. Every screen that you create has its own components in the Designer window. In the Blocks Editor, you will be able to see only the components of the screen currently selected in the Designer. Similarly, the blocks of code related to a screen cannot refer to blocks of code in another screen. For more information, See the Colored Dots App Tutorial which explains multiple screens in detail.

PseudoRandom Number Generator and Random Set Seed

A pseudorandom number generator is an algorithm for generating a sequence of numbers that approximates the properties of random numbers. A random seed is a number or a vector that is chosen and used to initialize this number generator. By choosing different random seeds, your algorithm will choose random numbers in a slightly different way. Choosing a unique seed will return a unique random number sequence.
What this means is that if you continually use the same seed and use choose random item for a large amount of tests and data, you won't get as diverse or truly random results as if you chose a new seed each time.

Data & Databases

A database is a place where information or data can be stored until it is removed or replaced. Facebook uses a database to store usernames and corresponding passwords. Android devices have internal databases that store information about you or your phone. App Inventor allows us to access this database through the use of TinyDB.
App Inventor makes it easy to store data through its TinyDB and TinyWebDB components. Data is always stored as a tag-value pair, with the tag identifying the data for later retrieval. TinyDB should be used when it is appropriate to store data directly on the device. When data needs to be shared across phones (e.g., for a multiplayer game or a voting app), you’ll need to use TinyWebDB instead. TinyWebDB is more complicated because you need to set up a callback procedure (the GotValue event handler), as well as a web database service.
To create your own web service, follow the instructions on the TinyWebDB component page.
For additional help on this topic, check out Chapter 22 from App Inventor: Create your own Android Apps by Dave Wolber, Hal Abelson, Liz Looney, and Ellen Spertus.

A Lesson on Variable Scoping


Note: Before you begin this lesson, please read the overview and explanations of Global vs Local Variables.

A Lesson on Variable Scoping

This is a lesson on variable scoping. If you are new to using global and local variables, this lesson is for you.

Getting Started

Connect to the App Inventor web site and start a new project. Name it "Variables". Open the Blocks Editor and connect to the phone.

Components

Although we are only building an app to show the difference between local and global variables and what happens between them, we will still need a few components.
⦁ A Label
⦁ A Canvas
⦁ A Ball Sprite
Drag both of these components from the Palette into the Viewer.

Setting component Properties

Click on the Canvas component. On the right side you should see a list of properties. Change Width to "Fill Parent" and Height to 300 pixels. This changes the size of your Canvas. This will allow us the move the Ball Sprite to a bigger range of locations on the screen.
Click on the Ball component. Set the Radius property to 10.
So far, your Design screen should look like this.

Moving the Ball Sprite: Arguments to Event Handlers are Local Variables

Go to the Blocks Editor. To move the ball sprite, we want the user to drag the ball to a position on the screen. To do this, we will use the Ball1.Dragged Event Handler and the Ball1.MoveTo.
Both of these blocks can be found under the Ball1 drawer. Drag them onto your screen and organize them like this.
Notice how the Ball1.Dragged Event Handler has six arguments: startXstartYprevXprevYcurrentX and currentY.
Now drag out a get block from the Variables drawer and place it on the screen, disconnected from the Ball1.MoveTo block. Try selecting currentX or currentY from the dropdown of the get block. There are no options for either of them in the dropdown. This is because arguments to an event handler are local variables. Local variables can only be accessed in the scope where they are declared. Outside of the event handler is outside the scope.
Now connect the get block to the x socket of the Ball1.MoveTo block. Click on the dropdown. Notice how you can now select startXstartYprevXprevYcurrentX or currentY. This is because the Ball1.MoveTo block is inside the event handler thus it is inside the scope and the local variables.
Finish connecting the x and y to the appropriate socket in the Ball1.MoveTo block. Your blocks should look like the following diagram.
Now that you've learned a bit more about local variables and scoping, we'll add another level of scoping. Continue reading the lesson to find out how.

Next step move the mole to a different location: Adding our own local variables

Now we want to add a new feature that when we touch the mole, we will move it to a new location that is based off its current position and a random number.
To do this, we will use the Ball1.Touched Event Handler. But we also want to create our own local variables to hold a random value for x and a random value for y so we will drag out a initialize local in do block. Click on the blue mutator icon and drag one additional variable into the block. Double click the names of the variables to change them. One should be named randomX and the other randomY. Click the blue minus sign to minimize the mutator window. Configure your blocks like the figure below.
We want randomX and randomY to be random values from 0 to 100. So we will set up our blocks to look like the figure below.
Now that we've created our new local variables, let's try getting their values and moving our Ball to a new location. Drag the Ball1.MoveTo block and place it underneath the initialize local in do block. Your blocks should look like the diagram below.
Notice how now if we grab a get block and connect it to the x socket of MoveTo, randomX and randomY are not available as options. This is because we are not in the scope of those variables. The scope for these would be inside the initialize block.
Now move the MoveTo block inside of the initialize block. Notice how randomX and randomY are now available as options. Additionally, x and y, the arguments to our event handler are still available because we all still in the same scope as our event handler (we are still inside of it).
Set the variables connected to the x and y sockets in MoveTo as randomX and randomY.

Changing the names of variables: seeing how scopes interact

Now, let's change the name of randomX and randomY to x and y. Notice how the local variables we are initializing now have the same name as the arguments to the event handler.
Because they have the same name, we need to follow a rule for when each variable can be selected. The rule we follow is that the variable whose scope is closest to the one we are currently in is available.
So when we are inside of the initialize local in do block, we can only access the x and y that reference the random number we selected and not the position of the Touch. Inside the Ball1.Touched but outside of initialize local in do, we can access the x and y that are the arguments to the Touch handler.
Try experimenting with local variables on your own. Local variables can be created from for loops, event handlers, and initialize local variable blocks.

<< Back to Main AI2 Concepts Page

Global vs Local Variables (App Inventor 2)


Variables can be thought of as containers that hold values. There are two types of variables that we can use: global and local.

Global vs Local Variables (App Inventor 2)

Global Variable

global variable is a variable that can be accessed in multiple scopes. This means that wherever you are in the program you can use that variable; get its current value or set its value to something else. Global variables are created using the initialize global name to block found in the Variables drawer.

Local Variable

local variable is a variable that is declared within a function or it is an argument passed into a function. This means that you can only access these variables in that specific function where they are declared or passed in as an argument.
Local variables are created when:
⦁ arguments are passed in to a procedure or event
⦁ using the initialize local name to block
⦁ using a for each in list or for each from to block (these for loops will create a local variable for the letter i

Variables Overview

The Variables drawer provides blocks to create, get, and set both global and local variables. Explanations of all of the blocks available in this drawer can be found on the Variables page.

Global Variable Example

Take out a get block and click the dropdown. There will be no variables to select. Create a global variable and name it count and initialize it to 0. Click on the dropdown of the get block. You can now see count available to choose. Once you have created a global variable, it will always be available in the dropdown of get .

Local Variable Example

Create a local variable using initialize local name to in do block and name it a. Now drag out a set block and put it outside of the initialize local name to in doblock. Click on the dropdown of the set block. You will not see a as a choice in the dropdown. This is because the set block is out of the scope of the local variable's domain. Move the block inside of the do part of the initialize local name to in do block. Click the dropdown of the set block. Now a is available to choose.

Variable Labels

Notice how when you use a get or set block for a global variable. The block will say global name.

When using get or set blocks for local variables, the block will only say name. Remember that local variables include variables created from arguments to procedures or event handlers, variables created for use in for loops, or initializing local variables for an expression or return statement by using the orange local variable initialize blocks.

Summary

So while inside a local variable block or a procedure that has arguments, the arguments or local variable that you named will also be available in the dropdown. But when you are not inside, they will not be available. When you select a value in the dropdown, the internal value saved to that variable will be returned and passed on to whatever block get is connected to.

Why would I ever need to use local variables?

Sometimes you may need to create a new variable within a procedure and only want that procedure to be able to use it.
In this example, we use a local variable, height, to store the height of the triangle whose hypotenuse and base we're given as arguments. We might have a different procedure that uses height as an argument so we would not be able to use a global variable. To make sure of that, we use local variables so that the height in the right context is only available in the procedure where it is used.
Sometimes it might just be easier to have local variables rather than creating many new global ones. Or it might allow us to use less blocks.
Want to experiment with global and local variables more? Check out this lesson on variable scoping.