Building your first app: HelloPurr
Now that you've set up your computer and device, and you've learned how the Designer and the Blocks Editor work, you are ready to build the HelloPurr app. At this point, you should have the Designer or Blocks Editor open in your browser, and either an Android device or an Android emulator connected to the Blocks Editor. (See Setup Instructions for App Inventor 2 if you do not have these things running.)
HelloPurr: tap the kitty, hear him meow
HelloPurr is a simple app that you can build in a very short time. You create a button that has a picture of a cat on it, and then program the button so that when it is clicked a "meow" sound plays.
To build HelloPurr, you'll need a image file of a cat and an audio file with a "meow" sound. Download these files to your computer by clicking the following links. To download: after clicking a link, right click on the image or sound bar and select "Save As." Save both files onto your desktop or downloads folder, or anywhere that you can easily find later.
Select components to design your app

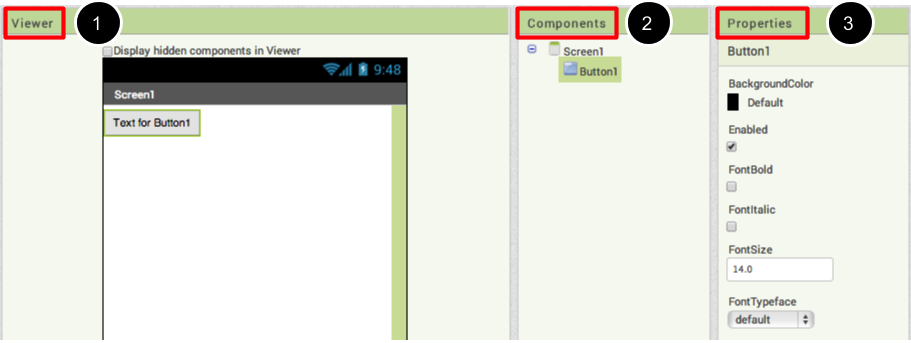
The App Inventor Components are located on the left hand side of the Designer Window under the title Palette. Components are the basic elements you use to make apps on the Android phone. They're like the ingredients in a recipe. Some components are very simple, like a Label component, which just shows text on the screen, or a Button component (#1 left) that you tap to initiate an action.
Other components are more elaborate: a drawing Canvas that can hold still images or animations, an Accelerometer sensor that works like a Wii controller and detects when you move or shake the phone, components that send text messages, components that play music and video, components that get information from Web sites, and so on.
To use a component in your app, you need to click and drag it onto the viewer in the middle of the Designer. When you add a component to the Viewer (#1 below), it will also appear in the components list on the right hand side of the Viewer.
Components (#2 below) have properties that can be adjusted to change the way the component appears or behaves within the app. To view and change the properties of a component (#3 below), you must first select the desired component in your list of components.
Steps for selecting components and setting properties
HelloPurr will have a Button component that displays the image of the kitty you downloaded earlier. To accomplish this:
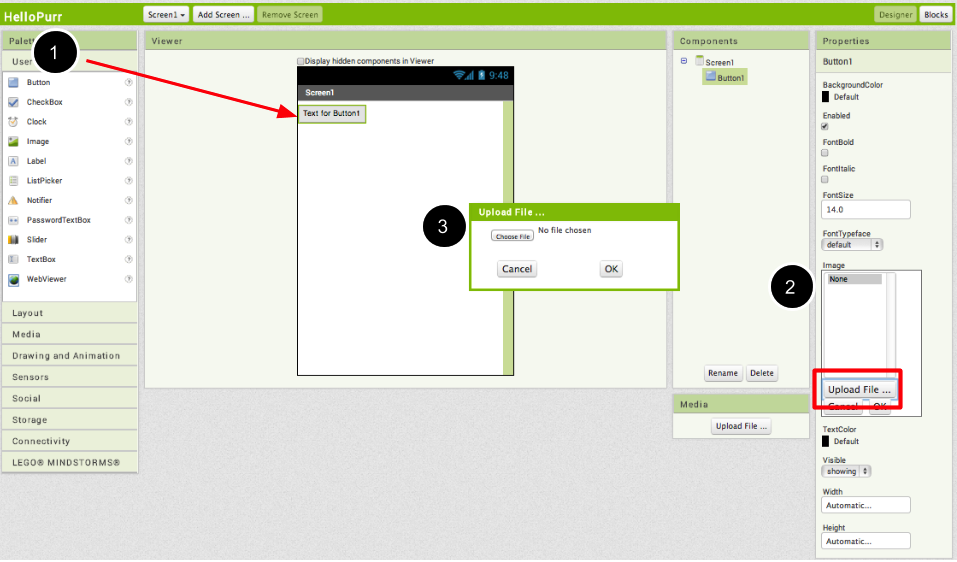
Step 1a. From the User Interface palette, drag and drop the Button component to Screen1 (#1).
Step 1b.To make the button have an image of a cat, in the Properties pane, under Image, click on the text "None..." and click "Upload New…" (#2). A window will pop up to let you choose the image file. Click "Browse" and then navigate to the location of the kitty.png file you downloaded earlier (#3). Click the kitty.png file, click "Open", and then click "OK".
Step 2. Change the Button's Text property: Delete "Text for Button1", leaving the Button's text property blank so that there is no writing over the kitty's face. Your Designer should look like this:
If the entire kitty picture is not showing up, you can fix this by setting the Height and Width properties of the button to "Fill Parent". To do this, click on the Button component, go to the right-hand Properties pane, scroll down to the very bottom to where it says Width and click on the word "Automatic..." to activate the drop down list. Choose "Fill Parent". Do the same for the Height property.

Step 3. From the User Interface palette, drag and drop the Label component to the Viewer (#1), placing it below the picture of the kitty. It will appear under your list of components as Label1.
Under the Properties pane, change the Text property of Label1 to read "Pet the Kitty" (#2). You'll see the text change in the Designer and on your device. Change the FontSize of Label1 to 30 (#3). Change the BackgroundColor of Label1 by clicking on the box (#4): you can change it to any color you like. Change the TextColor of Label1 (#5) to any color you like. Here, the background color is set to blue and the text color is set yellow.

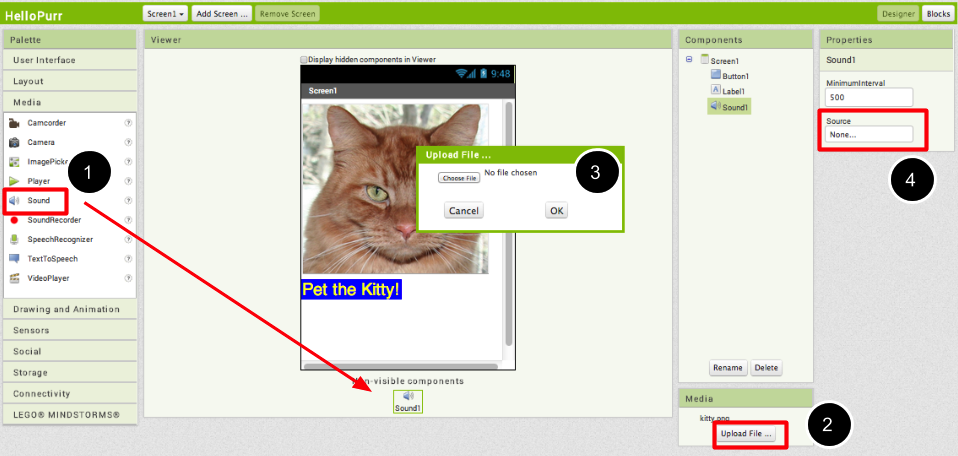
Step 4. Under Palette, click on the Media drawer and drag out a Sound component and place it in the Viewer (#1). Wherever you drop it, it will appear in the area at the bottom of the Viewer marked Non-visible components. Under the Media pane, Click Upload New... (#2) Browse to the location of the meow.mp3 file that you downloaded earlier and upload it to this project (#3). Under the Properties pane, see that the Source property currently says None.... Click the word None... to change the Sound1 component's Source to meow.mp3 (#4).
Programming with the Blocks Editor
So far you have been arranging your app's screen and components in the Designer, which is in a web browser window. To start programming the behavior of the app, you need to go to the Blocks Editor. Click the Blocks button to go to the Blocks Editor.

Once you have the Blocks Editor in front of you, continue to the next step to start programming your app with blocks.
Making the sound play
Step 1. On the left side of the Blocks Editor, click the Button1 drawer to open it. Drag and drop the Button1.Click block in the work area (the open area on the right).
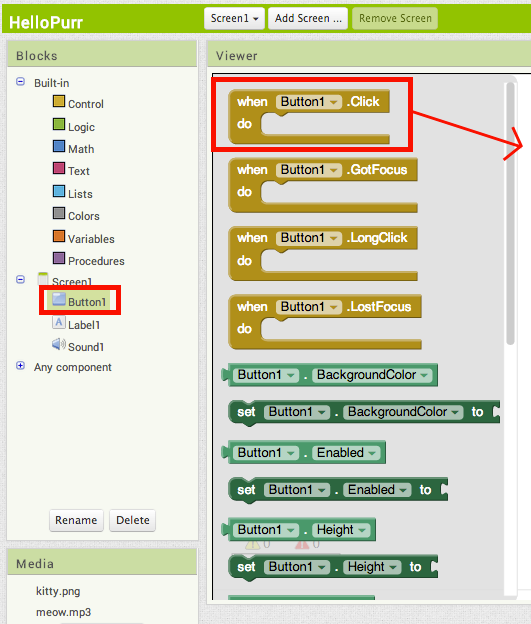
Those mustard yellow blocks are called event handler blocks. The event handler blocks specifiy how the phone should respond to certain events: a button has been pressed, the phone is being shaken, the user is dragging her finger over a canvas, etc. The event handler blocks are mustard yellow in color and use the word when. For example, when Button1.Click is an event handler
.
Step 2. Click the Sound1 drawer and drag the Sound1.Play block and connect it to the "do" section of the when Button1.Click block. The blocks connect together like puzzle pieces and you can hear a clicking sound when they connect.

The purple blocks are called command blocks, which are placed in the body of event handlers. When an event handler is executed, it runs the sequence of commands in its body. A command is a block that specifies an action to be performed (e.g., playing sound) when the event (e.g., pressing Button1) is triggered.
Your blocks should look like this at this point:
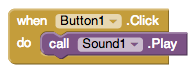
Now you can see that the command block is in the event handler. This set of blocks means; "when Button1 is clicked, Sound1 will play." The event handler is like a category of action (e.g., a button is being clicked), and the command specifies the type of action and the details of the action (e.g., playing sound a specified sound).
You can read more about the blocks and how they work here: Understanding Blocks in App Inventor 2.
Try It! When you click the button you should hear the kitty meow. Congratulations, your first app is running!
Note: there is a known issue with the Sound component on some devices. If you see an "OS Error" and the sound does not play - or is very delayed in playing, go back into the Designer and try using a Player component (found under Media) instead of the Sound component.
Packaging your app
While your device (emulator or phone/tablet) has been connected to App Inventor, your app has been running in real time on your device. If you disconnect the emulator/phone/tablet from the Blocks Editor, the app will vanish. You can always make it return by reconnecting the device. To have an app running without being connected to App Inventor, you must "package" the app to produce an application package (apk file).
To "package" the app to your phone or to send to someone else, click the Build tab at the top of the screen. Under Build, here are two options available for you to choose from.:
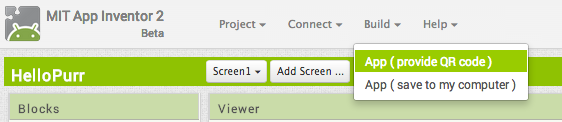
1. App (provide QR code): You can generate a Barcode (a QR Code), which you can use to install the app on a phone or tablet that has a camera, with the aid of a barcode scanner, like the ZXing barcode scanner (freely available in Google Play).
Note: this barcode works only for your own device because it is associated with your google account. If you want to share your app with others via barcode, you'll need to download the .apk file to your computer and use a third-party software to convert the file into a barcode. More information can be found here.
2. App (save to my computer): You can download the app to your computer as an apk file, which you can distribute and share as you like by manually installing it on other devices. (sometimes called "side loading".
Challenge! Make the cat purr
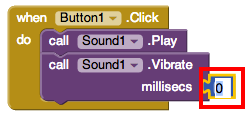
The challenge is to have the cat purr when the button is clicked. Go to the Blocks Editor and open the Sound1 drawer and drag the Sound1.Vibrate block and place it under the Sound1.Play block.
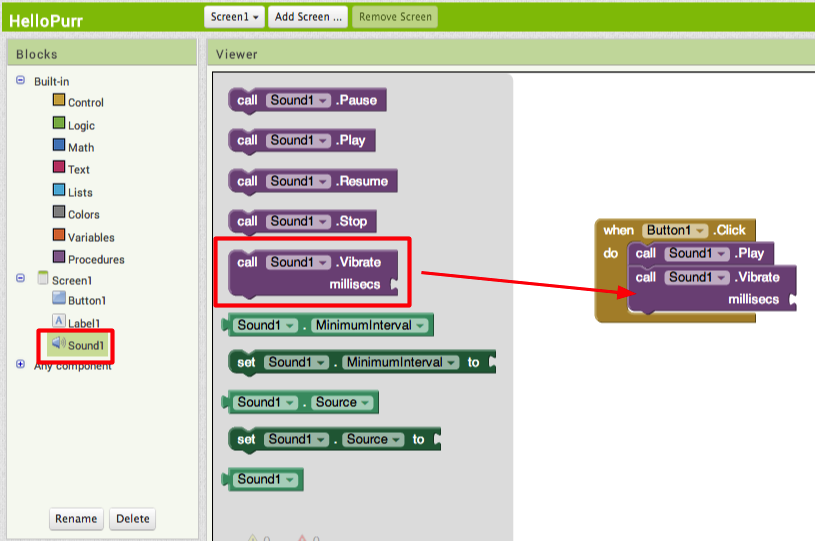
The Sound1.Vibrate block has an open slot, which means you need to plug something into it to specify more about how the behavior should work. Here, we want to specify the length of the vibration. Numbers are calculated in thousandths of a second (milliseconds): to make the phone vibrate for half a second, we need to plug in a value of 500 milliseconds.
In the Built-In palette, go to the Math drawer, drag the number block and place it at the socket of the Sound1.Vibrate.
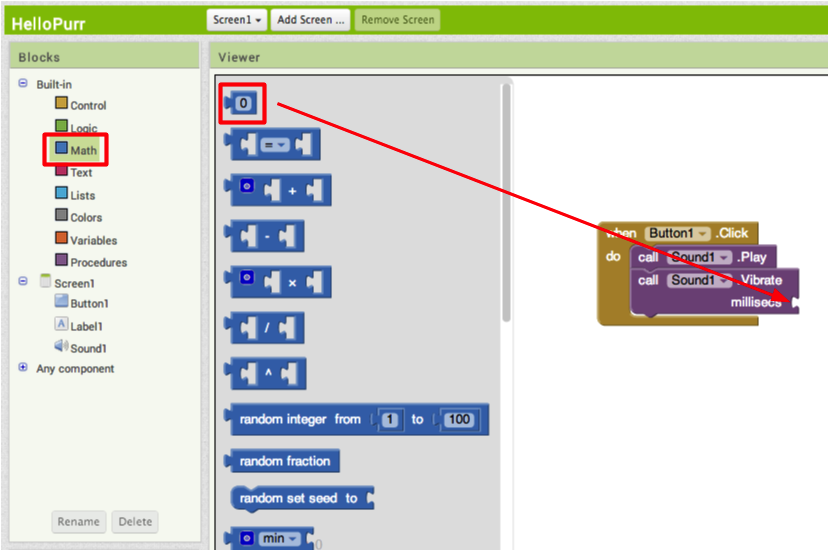
After you place the number block, click the number "0". It highlights the number in black: type "500" with your keyboard.
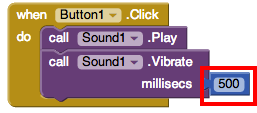
Done!
Now connect your phone and tap the image of the cat on the phone. The phone should vibrate and meow at the same time. If you packaged your app to your phone, this may not happen. Although it may appear that your phone is connected, it might not be in real time. To reconnect your phone, click the Connect button at the top of your screen, and select Reset Connection. If this does not work, close out of the app on your phone and restart the connection.
Review
Here are the key ideas covered so far:
⦁ You build apps by selecting components (ingredients) and then telling them what to do and when to do it.
⦁ You use the Designer to select components and set each component's properties. Some components are visible and some aren't.
⦁ You can add media (sounds and images) to apps by uploading them from your computer.
⦁ You use the Blocks Editor to assemble blocks that define the components' behavior
⦁ when ... do ... blocks define event handlers, that tell components what to do when something happens.
⦁ call ... blocks tell components to do things.
Scan the Sample App to your Phone
Scan the following barcode onto your phone to install and run the sample app.

Download Source Code
If you'd like to work with this sample in App Inventor, download the source code to your computer, then open App Inventor, click Projects, choose Import project (.aia) from my computer..., and select the source code you just downloaded.
Next steps
Now that you know the basics of how App Inventor works we recommend you:
⦁ Or, if you've been using the emulator and want to start using your phone, you can set up your Android device to build apps.
Something not working right? Visit the troubleshooting page, or check the App Inventor User Forum for help.
Tutorial Version: App Inventor 2
Tutorial Difficulty: Basic
댓글 없음:
댓글 쓰기