This tutorial will show you how to fetch files from your google drive, install them to a folder on your device, and then use them in the same app.
Before I start, credits to the wonderful Taifun of PuraVidaApps, who did most of the leg work for this.
Why do this? Because with a little bit of thought, you can use Google Drive not only to store but to access and display images and other files in your AI2 apps and beyond. Often you need many image files in an app and will exceed the 5mb limit, so you need to draw in the images from elsewhere.
I have setup the demo app to require a button click to start the downloading of files. In the real world you would most likely have this to run on Screen Initialise. The app will work with the images I have provided, so to use the demo you will not need to follow some of the setup.
Using the demo:
Install the apk (link) or run the aia through the Companion.
On the very first run of the app, you should click on the Get Images button. You should quite quickly see a yellow notification telling you you are downloading files, and soon after a picture of some donkeys. Wait until the Ready notification disappears, then if you click on the donkeys, you should then get an image of pigs, a further click will give you chickens and then back to the donkeys. To test it again, simply press the Reset button, then the Get Images button again. (This doesn't delete the images on your device, but behaves in the same way). If you installed the app and you start it up again, you will need to press Reset first before it will run properly. If you want to delete the images in order to further test using a file manager go to /sdcard/Download/prefetch/
How to create the fetching of files from Google Drive
Setup
You need Google Drive
Create a folder and give it public access
Add your images (in my case only three from another project)
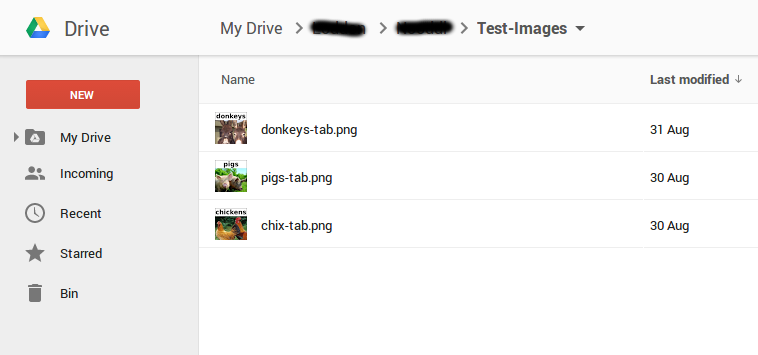
Note the name of your folder
Open up two google sheets (yes, I know it could all be done in one sheet if I wasn’t so lazy with the coding! This separation does help in someways, though)
Name one for SheetIDs, the other SheetNames
Open up the script editor for each and add the correct code.
Code for SheetIDs (NOTE: SEE BOTTOM OF POST REGARDING API CHANGES IN GOOGLE APPS SCRIPT)
function getimgfileids() {
// This example gets a folder from Google Drive and pastes the ids for the files it contains to a spreadsheet.
// Could be setup with a time based trigger to keep up to date.
var ss = SpreadsheetApp.getActiveSpread
var sheet = ss.getActiveSheet();
var urlCol = 1; // column number where URL's should be populated; A = 1, B = 2 etc.
var urlRow = 1; // row to start at, increments with each file to create list.
var folder = DocsList.getFolder('Test-
var files = folder.getFiles(); //"gets" all the files in the folder.
sheet.clear(); //removes all data from sheet for fresh start
for (var i in files) {
sheet.getRange(urlRow, urlCol).setValue(files[i].getI
urlRow = urlRow+1;
}
}
Code for SheetNames (NOTE: SEE BOTTOM OF POST REGARDING API CHANGES IN GOOGLE APPS SCRIPT)
function getimgfilenames() {
// This example gets a folder from Google Drive and pastes the names for the files it contains to a spreadsheet.
// Could be setup with a time based trigger to keep up to date.
var ss = SpreadsheetApp.getActiveSpread
var sheet = ss.getActiveSheet();
var urlCol = 1; // column number where URL's should be populated; A = 1, B = 2 etc.
var urlRow = 1; // row to start at, increments with each file to create list.
var folder = DocsList.getFolder('Test-
var files = folder.getFiles(); //"gets" all the files in the folder.
sheet.clear(); //removes all data from sheet for fresh start
for (var i in files) {
sheet.getRange(urlRow, urlCol).setValue(files[i].getN
urlRow = urlRow+1;
}
}
Run the code on each sheet. Note: for your own work you will have to change the name of the folder in your code (Look for “Test-Images”).
A list should appear in Column A for each sheet, one of IDs and one of Names. Google kindly keeps everything in order.


If you have a static app you need do no more, if your images folder is likely to change, you can setup a trigger to run say once a week, then you can advise users to re-run the fetch.
You now need some urls:
For each spreadsheet:
open the sharing settings for each file and copy it, should look like this:
https://docs.google.com/
replace the /edit?usp=sharing with /export?format=csv
For the google drive folder use:
Create a new project in AI2
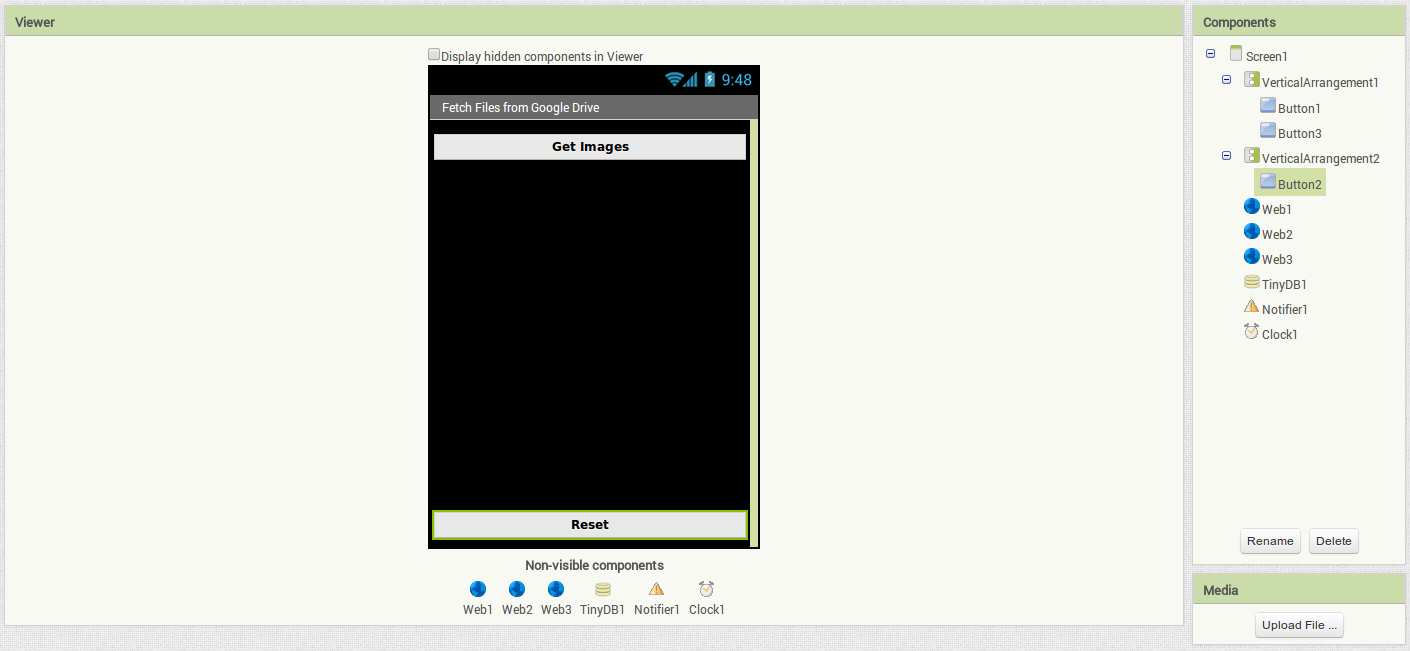
AI2 Designer
I’ll leave you to decorate as you see fit, but all you need for this to work are three buttons
and 3 Web thingies, a Notifier, a Clock, and a TinyDB
AI2 Blocks
Summary: We make a list of the IDs and the Names, use the IDs to create a downloadable url for each file and the Names to, well, name the files (!). We then fetch each file in turn. Finally just to prove it worked, the images are loaded to a button so you can click through them. (Sounds easy, huh?)
We need some global variables:
A few counters, and a couple of empty variables for lists
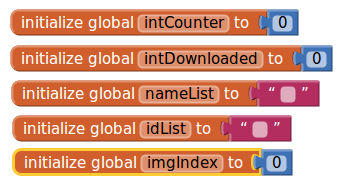
Two urls for each spreadsheet as above, a download url, and finally a save location.

Web1 grabs the names of all the files in the folder and puts them in a list, “nameList”.
Web2 grabs the IDs of all the files in the folder and puts them in a list, “idList”. And then it starts the Clock Timer.
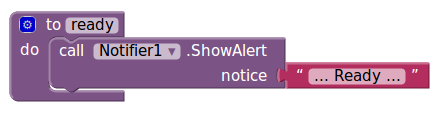
I found I needed a timer to slow down the checking of the database test and the initiating of the file downloads. The database check tests to see if the download has been run before, if it has, and has completed successfully, then it won’t try to download anything and will report “Ready” with the Notifier. The key element is the “nextfile” procedure.


In essence, the nextfile procedure iterates through each file in the lists and initiates the download. You will see I had to “trim” the output from the list to remove the parantheses on either end. This then takes us to Web3.

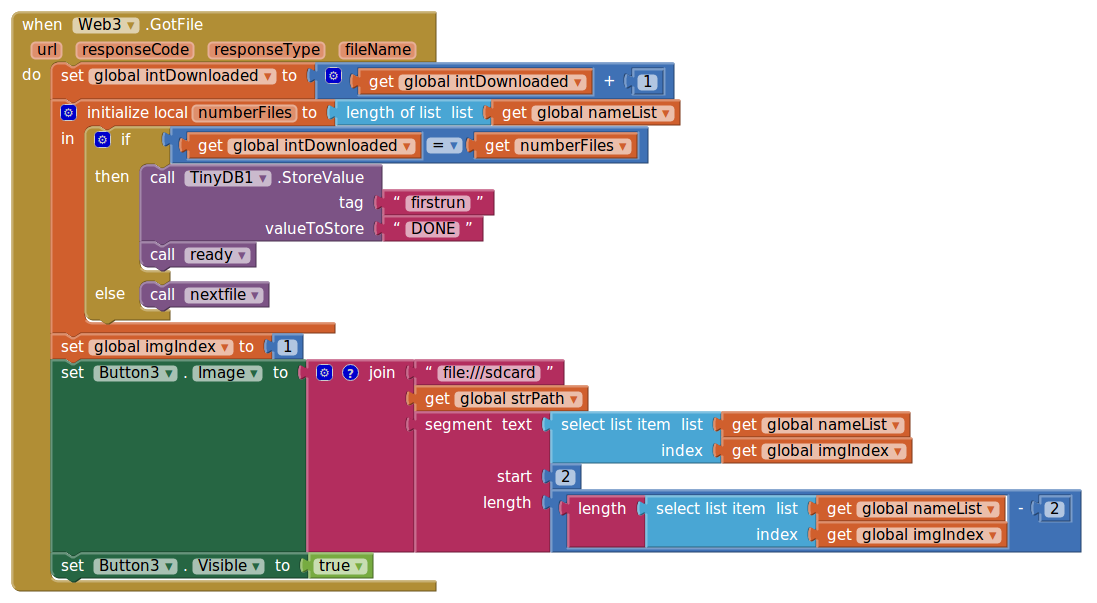
Web3 will test if we have finished, if we haven’t it calls “nextfile” again. If we have finished, then commits “DONE” to the tinydb, and sets the first image to Button 3.
Button1 starts all this off
Button2 resets things (namely the database) so you can run everything again.
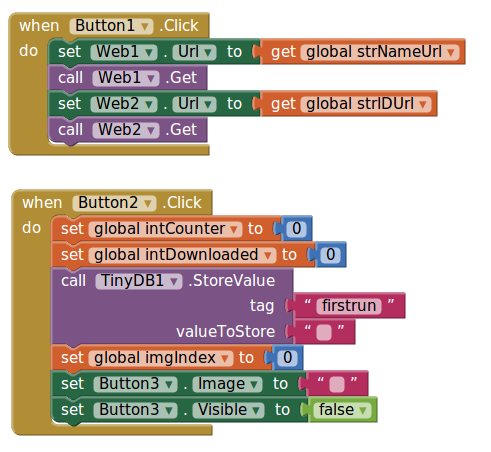

Button3 iterates through all the image files in the folder on the device and displays them on the button
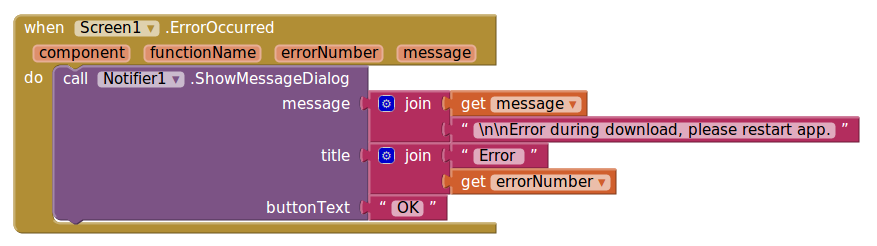
There is a screen error block too in case something goes wrong
I have attached an aia file and a link to the apk to save you having to write the code out by hand, and will be happy to answer any questions or to help deal with any bugs I haven’t found!
Enjoy :)
[EDIT]
Google have changed their API for grabbing folders and documents from DocsList (deprecated 20th April 2015) to DriveApp, so users will meed to amend the spreadsheet scripts accordingly. Should look something like this:
function getimgfileids() {
// This example gets a folder from Google Drive and pastes the ids for the files it contains to a spreadsheet.
// Could be setup with a time based trigger to keep up to date.
var imgFolderID = '0B5al230KXbSyZlJvV3FmdHBvZEE'
var ss = SpreadsheetApp.getActiveSpread
var sheet = ss.getActiveSheet();
var urlCol = 1; // column number where URL's should be populated; A = 1, B = 2 etc.
var urlRow = 1; // row to start at, increments with each file to create list.
var folder = DriveApp.getFolderById(imgFold
var files = folder.getFiles(); //"gets" all the files in the folder.
sheet.clear(); //removes all data from sheet for fresh start
while (files.hasNext()) { var file = files.next();
sheet.getRange(urlRow, urlCol).setValue(file.getId())
urlRow = urlRow+1;
}
}
--
That is fantastic Tim, excellent work. This will come in very handy.
--
My pleasure :)
--
Thank you for sharing with the community Tim. I expect there should be a lot of interest in how to do this. It works real neat!
--
great solution for downloading several files!
I now linked to your example from my "Webprefetch File by File" page https://puravidaapps.com/
--
Hi, I can not see the images could you post it again?
--
Fixed the images, (for a second time!)
Also added a pdf of the tut in case images disappear again :)
--
Thank you. Will help me with annual files.
--
댓글 없음:
댓글 쓰기