Initial Release 1.0 (part of MIT App Inventor Release nb149)
DRAFT: September 27, 2015
sample extensions are at: http://appinventor.mit.edu/extensions/
source code for sample extensions at: http://appinventor.mit.edu/extensions
forum for feedback and comments: Extensions section of the appinventor forum
Please help us test and provide your feedback. The extensions feature is still under development, and the internal formats are not yet stable. If you build extensions, be aware that you will probably need to rebuild them when the system changes. This applies not only the the extensions themselves, but to the projects that import them. For now, use this document to experiment with building extensions for your own use. If you publish your extensions for others to import into their own projects, be sure to warn people that your extensions may go of date and will need to be updated.
Note: App Inventor extensions are supported only on Android devices running API Level 8 (Android system 2.2 Froyo) and above. This applies to creating extensions, building projects that import extensions, and running packaged APKs of projects that use extensions.
1. Overview of App Inventor extension components
App Inventor apps are built using components. Components let the apps use the built-in features of the mobile device (like Camera or LocationSensor) or services on the Web (like Twitter or FusionTables). App Inventor includes a large collection of components, and the App Inventor development team adds new capabilities to the system by implementing new components.
There have been many requests to include additional features in App Inventor. Some of these are special-purpose features that would have only a few users, where it would be undesirable to include these in the core system for everyone. Other features might be good additions to the core system, but the App Inventor development team’s effort has gone to other priorities.
Anyone can use the App Inventor free and open source code to implement their own components, but until now the only way to make these available to others has been to include them in private versions of App Inventor that are hosted and managed individually.
App Inventor Extensions lets anyone create Extension Components. Extension components can be used in building projects, just like other components. The difference is that extension components can be distributed on the Web and loaded into App Inventor dynamically: they do not have to be built into the App Inventor system, and they can be imported into projects as needed. With extensions, the range of App Inventor apps can be virtually unlimited.
One use of extensions, for example, is for educators and educational software developers to provide extension components tailored to specific lessons and activities that students can use in building apps. Examples might be simulations or data analysis tools. Those apps might be unfeasible to create directly with the built-in App Inventor blocks, either because of processing speed or programming complexity. But those same apps might be readily programmable in the App Inventor framework, using extension components that perform the necessary processing.
Anyone can create extension components. This requires gaining familiarity with the App Inventor source code (located on Github) and programming the extension in Java. Extension components are packaged as aix files. Once you create an extension component, anyone can use it in their App Inventor projects. Extension component aix files can be housed anywhere on the Web. The aix files need not be stored at MIT or any other particular place, although MIT hosts a repository where people can make aix files available for sharing and public use.
Note: One limitation of the current extension component implementation is that it creates non-visible components only (i.e., components that do not show on the designer screen). MIT plans to remove this restriction in future versions of the extension component system.
2. Testing the current prototype
Please send your comments and reports on you experiences with the test instance, by reporting them in the App Inventor Support forum under the extensions category.
Caution: Do not transfer projects between the current testing instance and main MIT App Inventor. If a project uses extensions, it cannot run on the main MIT App Inventor system. You can take an ordinary project and upload it to the test system and add an extension, but the result cannot be exported back into the main MIT App Inventor.
3. How to use extension components
You use an App Inventor extension component just as you would use an ordinary built-in component, except that you’ll first need to import the extension into your project.
3.1 Importing extension components
Before you can import an extension component, you must have a project open. Start a new project, or open an existing one. To import an extension, look in the components palette at the left of the screen under Extensions and click the “Import extension” link as in the figure below. This will bring up a window that lets you specify an extension to import. Extensions are defined by aix files. You can import an extension from an aix file on your computer or you can specify a URL to import from the Web.

Figure 1: Importing an extension
When you import an extension, App Inventor will give you the opportunity to rename it, as shown in the figure.

Figure 2: Renaming an extension when you import it.
You’ll generally want to keep the default name. See the section below on naming for cases where you might want to choose a different name.
Once you import an extension, it will appear in the components palette under the extensions category as shown in the figure below.
After importing an extension, make sure to restart the companion app, else an error may occur.

Figure 3: An imported extension shown in components palette
3.2 Some sample extensions to try
Here are some sample extension components to experiment with. You can find these in the MIT App Inventor Extensions repository at http://appinventor.mit.edu/extensions/. MIT will be adding more examples to this collection, and would like to evolve it into a site for people to share extensions. You can import the extensions using the URL indicated, or you can download the aix files to your local computer and import the files from there.
- VectorArithmetic created by Ethan Hon
Takes in two vectors and can add them to return a result vector.
https://drive.google.com/uc?export=download&id=0B22N7pfciq0CSHlFQVBCRk5OYlB3U3FDWFNlNDhvOVp5bDM4
- ImageProcessor created by Justus Raju
ImageProcessor can do a weighted combine of two images, return the greyscale of an image. http://appinventor.mit.edu/extensions/data/extensions/ai.cdk.justus.ImageProcessor.aix
Here is a clean project that demos the use of the component. You can import this aia directly too. http://appinventor.mit.edu/extensions/data/demo/ImageProcessorDemo.aia
- SoundAnalysis created by Mouhamadou Oumar Sall
Multimedia component that analyzes the pitch of a sound through the microphone and returns it. It can be used as an input to different situations, for instance to control some components with a specific sound whistle(pitch > 500Hz) or clap(pitch > 2000Hz).
https://drive.google.com/uc?export=download&id=0B22N7pfciq0CUTZONWpKZUw2YXJlWHBMcERuaUliZWREdU5R
- ScaleDetector created by Hal Abelson
This component add a pinch detector capability to a Canvas. For an explanation, see Using App Inventor extensions to implement multitouch.
3.3 Building projects with extension components
Once you have imported an extension component into a project, it will appear in the component palette under the Extensions section. You use the extension component just like any other component by dragging it from the palette to the designer screen, where it will
appear under the designer screen as an non-visible component. (Currently, all extension components are non-visible components.) You’ll also see it in the Blocks Editor, together with blocks for its methods, properties and events. The figures below illustrate how an imported ImageProcessor extension would appear the Blocks Editor.
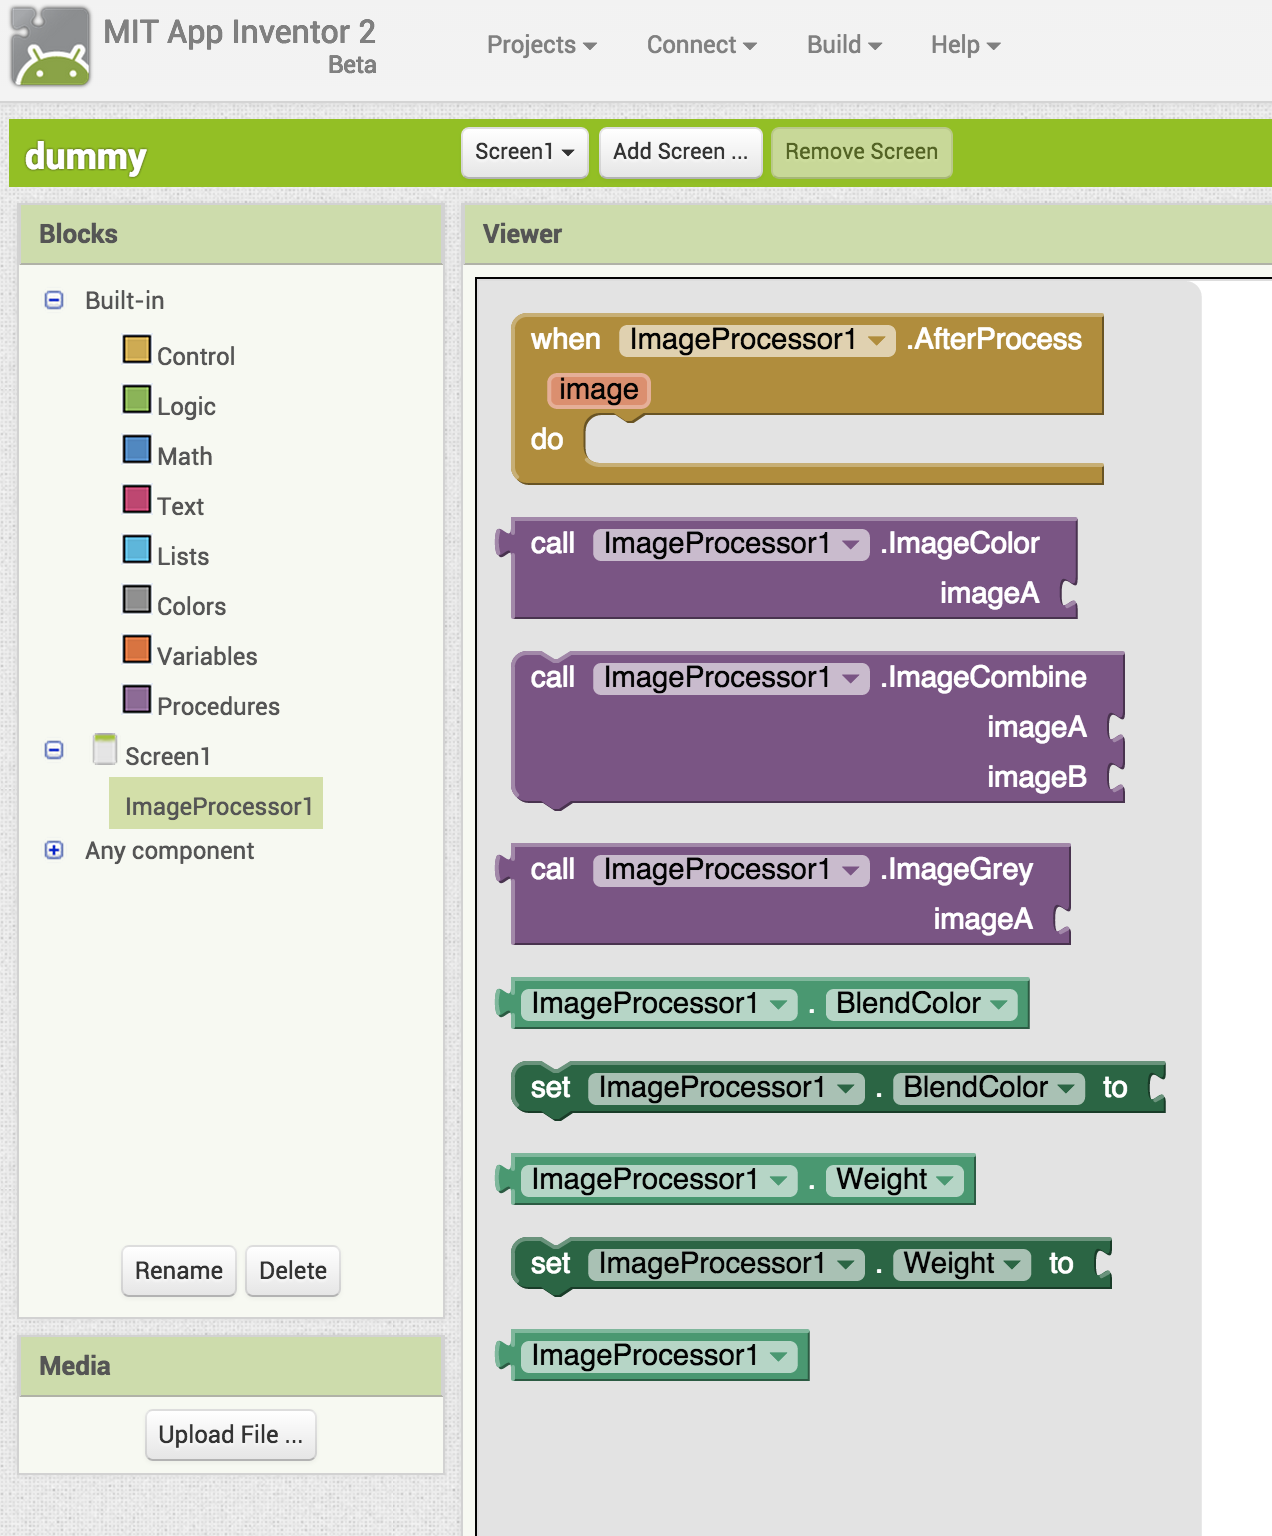
Figure 4: Blocks for an imported ImageProcessor component
3.4 Deleting extension components
To delete an extension from the project, click the X beside the extension. This will remove all uses of the extension and its blocks from the the project and you will not see it in Extensions palette panel anymore.

Figure 5: Click the X to delete an imported extension.
3.5 Sharing projects that use extension components
You export and import projects that use extension components just like other App Inventor projects, as aia files. You need not do anything different in publishing the project than in publishing other App Inventor projects. If someone imports a project (aia file) that uses an extension, they do not have to import the extension (aix file) separately: When they open the project, the extension will appear in the components palette (under Extensions) together with the project’s other components.
3.6 Extension component repositories
Extensions can be downloaded from any URL (provided you have access to it). Anyone who creates extensions can make the aix files available however they choose. It might also be convenient to create collections of extensions, called extension component repositories for private or shared use. For instance, an educator might create a repository of extension components for use in a course.
The MIT AppInventor project has created a public repository for general use, to encourage people to create and share extensions. The repository is located at http://appinventor.mit.edu/extensions.
3.7 Naming extension components
Extensions are created by different people working independently. So it’s likely that different extensions might have the same name. For example, there might be two different extensions called ImageProcessor, and you’d like to import them both. There’s no problem using the two extensions if you use them in different projects (other than that you might get confused). But you can’t import two extension with the same name into a single project. When you import and extension to a project, App Inventor will give you the opportunity to rename it, as shown in Figure 2. This will let you keep the extension names unique and also (should you prefer) choose names for the extensions that are more convenient for you than the original names.
`
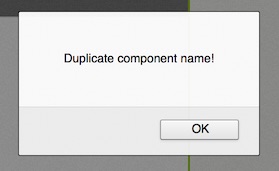
(warning when you give the extension a name that already exists in the project)
If you are developing extensions (not just using them) you can choose extension package names help minimize name conflicts. See the section on packages below.
3.8 Updating projects that use extensions
We have not addressed the issue of what happens when extensions are updated and how people using the extension can be notified about this. There are two scenarios to consider:
- The extension developer creates a new version of the extension, but the old version still works.
- The App Inventor system is updated so that the extension no longer works.
In either case, people importing the extension will need to look to extension developer to provide information about updating projects that import the extension
Warning: The extensions system is still experimental and the internal format of extensions is changing. If you create a project (aia file) that imports an extension, it is possible that the extension (and the project) will stop working when the extensions system in upgraded. You’ll have to rely on the extension developer to provide an updated extension.
4. How to create extension components
NOTE: As of 06/19/2016 Extensions must *not* be built in the com.google.appinventor.components.runtime package. You should use a different package name. See section 4.3.1 for more information.
Extension components are created by programming in Java. The Java code can be original code that you write, and it can also include Java libraries (jar files) from other sources.
You can create extension components for private use, or you can share them by sending people the aix files or making the files available on the Web.
The process of creating an extension component is essentially the same as what people go through in creating an ordinary App Inventor components, both for MIT App Inventor or for local versions built using the App Inventor free and open source code. The difference is that the only way to make an ordinary component available to other people is to host your own App Inventor instance, whereas with an extension component, you can publish the aix files so that anyone can import it into any version of App Inventor.
Building an extension component is no more difficult than building an ordinary component -- but then again, it’s no easier. If you’ve never created a component before, you should start by reading the these guides:
This shows how to get the MIT App Inventor sources and how to use them to create a local App Inventor instance on your own computer for personal use
Note: Please see Appendix A: Temporary instructions for obtaining the source code. This shows how to get the source for the extensions version of App Inventor, during this period when we are still testing.
This gives an overview of component programming, including how to implement the
Java code for the properties, methods and events, and how to define the blocks for the
Blocks editor.
It would also be a good idea to look at the resources at the MIT App Inventor Open Source Web page. You might also want to participate in the MIT App Inventor Open Source Development group which is a good place to find advice on implementing components.
Here are the steps we recommend in building an extension component. These are detailed in the sections below:
- Set up a local version of App Inventor for your own use, building a simple extension component for it, as practice.
- Build your desired component for your local instance and test it carefully.
- Modify your component to have the correct package name.
- Generate an aix file, so that the extension can be imported.
- Test the aix file by importing the extension into a project you build on the public App Inventor server.
- Publish your extension.
4.1 Practice building a simple component
You can skip this step if you’ve already built App Inventor components. But if you haven’t created components, you should first get some practice by creating a simple example. Even if the required Java coding is minimal, there are a lot of details involved in setting up the software for creating and running a local instance of App Inventor.
The detailed instructions for building components are in How to Build App Inventor from the MIT sources. The instructions begin by explaining how to set up your development environment and download the App Inventor source code from Github.
Note: The extensions feature has not yet been merged into the main App Inventor source code branch. Until that merge happens, you should replace the instructions on obtaining the source as explained in How to Build App Inventor from the MIT sources by the instructions in Appendix A.
Once you are set up, a simple way to practice building components is to create an extension component that’s a copy for an existing component and give it a different name. For example, you might create a component called AltCamera that behaves exactly like the Camera component, except for its name and the fact that it will be an extension.
To build AltCamera, install the App Inventor source code in a git repository on your local machine, following the instructions in How to Build App Inventor from the MIT sources. Go to the directory
appinventor/components/src/com/google/appinventor/components/runtime
and copy the file Camera.java to a new file AltCamera.java. Near the top of the file, you’ll see
@DesignerComponent(version = YaVersion.CAMERA_COMPONENT_VERSION,
description = "A component to take a picture using the device's camera. " +
"After the picture is taken, the name of the file on the phone " +
"containing the picture is available as an argument to the " +
"AfterPicture event. The file name can be used, for example, to set " +
"the Picture property of an Image component.",
category = ComponentCategory.MEDIA,
nonVisible = true,
iconName = "images/camera.png")
Change the description, category, and iconName definitions as follows:
description = “This is an alternate version of the Camera component.”
category = ComponentCategory.EXTENSION
iconName = "images/extension.png"
The description is the text that will appear when the user presses the question mark next to the component name in the designer pallet.
Note: For App Inventor’s built-in components, the description text is internationalized so it can appear in the local language that App Inventor is set to. The extensions implementation does not support internationalization and the description text will remain as you’ve entered it, regardless of how the local language is set.
A few lines below @DesignerComponent, you’ll see
@SimpleObject
public class Camera extends AndroidNonvisibleComponent
Change this to
@SimpleObject(external = true)
public class AltCamera extends AndroidNonvisibleComponent
This gives your component the new name AltCamera specifies that this is an external component, which gives it a delete “X” button.
A few lines below the SimpleObject declaration, you’ll see the class constructor
public Camera(ComponentContainer container) { ...
Change “Camera” to “AltCamera”.
Finish building your modified App Inventor code, as described in How to Build App Inventor from the MIT sources, launch it on your local machine, and connect a browser to localhost port 8888. Log in and create a project that uses AltCamera. If all has gone well, you should see two camera components in the designer palette: the original Camera in the Media Section, and a new AltCamera in the Extensions section. Test this by using AltCamera in a project, opening the Blocks Editor, and observing that AltCamera has all the correct blocks -- the same blocks as Camera.
4.2 Create your extension as an ordinary component and test it
Now that you’ve verified that you can build a component that’s a copy of an existing one, go ahead and build your desired extension component. Here are some things to note:
- Implement your component programming in Java, just as any other component, by creating a file YourComponentName.java in the directory appinventor/components/src/com/google/appinventor/components/runtime
- The memo How to Add a Component, describes the elements that must be included in the Java file that defines the component.
- We have not yet provided a mechanism for internationalizing extensions. For now implement the method names and messages in the language of your choice.
Build your local instance, run it, and connect a browser. Your component should appear as an ordinary built-in component in this instance, except that it will appear in the designer Component Palette under the Extension category.
Create a companion for your local instance, that includes your new built-in component, and install this on your phone so you can test. You can use “ant installplay” to perform the companion installation, as explained in How to Build App Inventor from the MIT sources.
Using your local instance and new companion, create one or two projects that use the new component and test the component. You should test especially thoroughly if you are planning to publish the component for other people to build apps with.
4.2.1 Restrictions on extension components
Your component can be anything you can implement, with the following restrictions:
- It must be a non-visible component. (Keep in mind that “non-visible” here refers to visibility in the App Inventor designer, not visibility on the phone screen. You can still create components that use anything in the Android SDK and produce visible results in the app on the phone; they just won’t appear in the designer screen.)
- The property editors (i.e., the things that determine how users specify property values in the designer), must be ones that are already included in core appinventor (e.g. those that are implemented here).
- The category specified in @DesignerComponent must be
Category = ComponentCategory.EXTENSION
- The icon name file specified in @DesignerComponent should be
iconName = "images/extension.png"
You could include a link to your icon on the internet, for example
iconName = "http://somewhere.com/images/yourIcon.png"
The icon should be a 16×16 png file. Caution: If you supply a URL for the icon, the icon will not be packaged with your extension. Rather, App Inventor will read it from the Web each time the extension is shown in the designer, which may lead to strange behavior if the link is slow, or the target of the link changes.
4.2.2 Requesting permissions for the extensions you define
Your component might need to request permissions, just as ordinary components do, with the @UsePermissions declaration. That will be sufficient for using the extension in projects that you build and package.
But there is complication with live development. Importing the extension, even if it specifies @UsePermission, will not guarantee that the permission will be available to the App Inventor companion for live development. In most cases, this will not be a problem because the Companion comes with a wide range of permissions used by any of the App Inventor built-in components. But if your extension uses a permission that is not one of these, it might not be possible to build a project with it using live development.
4.2.3 Using external libraries
In addition to your own Java code, you can also include external libraries, by following the steps in How to Add a Component. The library jar files will be included in the aix file when you package your extension
One complication here is that the external libraries (jar files) must be unique across projects. If a project imports several extensions, then two different extensions cannot import the same jar file.
4.3 Choose a package name for your extension
Now that you’ve tested that your component code works as a built-in component, the next step is to set it up to work as an external component in an appropriate package.
If you are creating an extension solely for personal use, you needn’t be concerned about naming and you can skip this step. But if you are publishing extensions for other people to use, you should pick names for your extensions in a way that will help guarantee that your names will be unique. The method here is similar to how Web sites are named. For example, if the MIT App Inventor project was going to create a Web site named OurNewSite. we’d be following good practice by putting the Web site at the URL OurNewSite.appinventor.mit.edu. In a similar way, if we were publishing an extension named ImageProcessor, we do well to use an analogous extension name that specifies the extension as coming from appinventor and mit and edu. The convention here (adopted from the way people name Java libraries) is to list the path elements in reverse order, so the name would be edu.mit.appinventor.ImageProcessor.
In this naming scheme, ImageProcessor is the extension name and edu.mit.appinventor is the package name. The two combined, edu.mit.appinventor.ImageProcessor, is called the fully qualified name. When people import your extension, they see the extension name, not the fully qualified name. The extension name is the name they can change when they import the extension, as described above and shown in figure 2. But the fully qualified name is fixed: Appinventor will not import two different components with the same fully qualified name. If you try to do that, you’ll get an error as shown in figure 6.

Figure 6: Error signalled when trying to import a duplicate extension (i.e. with same fully qualified name as an existing extension)
4.3.1 Change your extension to have the desired package name
To make your extension have the desired package name, you need put its Java code in a directory tree whose subdirectories mirror the package name. This tree should sit under appinventor/components/src. For example, to make the Imageprocessor extension be in the package edu.mit.appinventor, you would go to the appinventor/components/src directory and in there create the tree edu/mit/appinventor. In more detail
- go to the folder /appinventor/components/src, and in that folder
- create a folder edu, and in that folder
- create a folder mit, and in that folder
- create a folder appinventor, and in that folder
- put the file ImageProcessor.java
Create the corresponding tree for your desired package name, and move the Java file that defines your component to the tree. (If you copied the Java file instead of moving it, don’t forget to delete it from its old location in ../components/runtime.)
Now go to the Java file you just moved. At the top, you should see the line
package com.google.appinventor.components.runtime;
Change the package name from com.google.appinventor.components.runtime to your actual package name. For example if your package name is edu.mit.appinventor, as our example above, change the line to
package edu.mit.appinventor;
Finally, at the top of your component definition Java file, right under the package name, you’ll see a list of imports. Add a new import at the top of the list:
import com.google.appinventor.components.runtime.*;
The reason for adding this is that your component Java definition code might have used some modules in the original package, and these might not be available when you move to a new package.
Note: You don’t need to import all of runtime.*, just the actual files you use. You can identify these by attempting to build the instance and seeing where you get undefined symbol errors.
Now that you’ve made these changes, run
ant clean
and build your local App Inventor instance again. Run your instance and connect a browser. The result should look the same as before you changed the package. Test everything again to verify that you can create a new working companion, and you can build projects with the new component.
4.4 Create the aix file for your new component
When you’ve tested enough (you can never test enough!) it’s time to create the aix file that lets
people can import your extension.
Make sure you have changed the @SimpleObject line just over the top of your extension Java class to @SimpleObject(external = true) to enable packing extensions.
Connect to the directory appinventor-sources/appinventor and run the command
ant extensions
Your aix file should appear in the directory
appinventor-sources/appinventor/components/build/extensions
The name of the aix file should be the fully qualified name of the component you created.
To test that your extension works, copy the aix file to a convenient location on your computer.
Now go to a public instance of App Inventor that does not have your extension. Make sure to switch your companion back to the version for that instance.
Create a new project and import the extension, using the aix file from the your computer and test once more that the imported extension works in a project.
Test your project using companion in live development mode, and also test that you can build the project to produce a working apk file. Make sure to test both modes.
4.5 Sharing your extension
You can share your extensions by making the aix files available in any way that you choose. People just need to access the files and import them into their projects. The MIT App Inventor group has a small set of sample extensions at appinventor.mit.edu/extensions. We plan to open this site as a repository for people to share extensions, after we get a bit more experience.
Remember that when you share your extensions, you are publishing software for others to use in building their projects, and they will be relying on you to keep your extensions up to date and bug-free.
Note: The internal representation of extensions is still undergoing change. Please use the current testing system to experiment with creating extensions, but don’t be surprised if these will need to be regenerated as the extensions implementation evolves.
Project that import extensions are not permitted on the MIT App Inventor Gallery, since the aia file contains only the binary code of the extension, and apps on the Gallery must be fully available in source code form. We are considering ways to handle this issue, but this is not yet ready.
Acknowledgements
App Inventor extensions are a major addition to App Inventor. They were created as part of the Google 2015 Summer of Code project by Ethan Hon, Justus Raju and Mouhamadou Sall. They did a remarkable piece of work, and they deserve the thanks of the entire App Inventor community.
Appendix A: Temporary instructions for obtaining the source code
To work with extensions before the merge you should replace the instructions on getting source code at the beginning of section 2.1 of How to Build App Inventor from the MIT sources by the following.
The App Inventor source code is available as Free and Open Source Software that you can download. Once you’ve installed the other software listed in section 3, you can clone a git repository of the source code by running the following git command from a shell:
This will create a folder named “appinventor-sources” where the sources (and a copy of the repository) will reside. If you have problems with this command, please visit the MIT Center for Mobile Learning github site at https://github.com/mit-cml.
Now fetch all the branches of the source repository and check out a new branch based on the “cdk-v0.1” branch where the App Inventor team is currently completing the extensions system and create a new branch from that for your own work:
git fetch origin
git checkout -b cdk-v0.1 origin/cdk-v0.1
git checkout -b myNewBranch
As you create your extension in your repository work on this new branch.

This work is licensed under a Creative Commons Attribution-ShareAlike 4.0 International License
블로그 관리자가 댓글을 삭제했습니다.
답글삭제