I2C LCD
Introduction
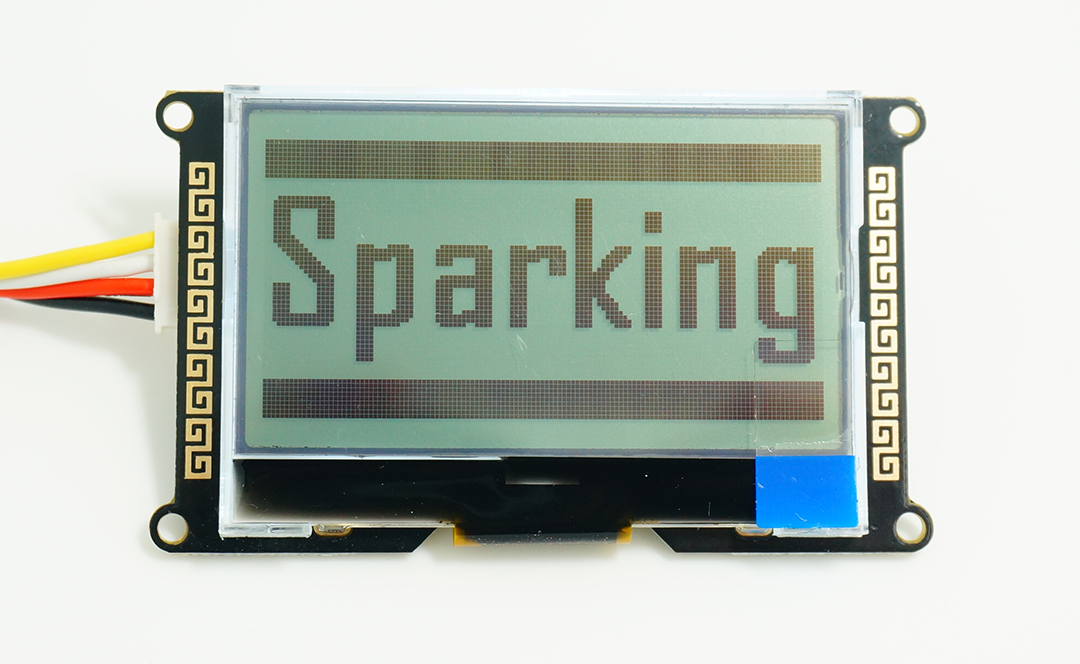
I2C_LCD is an easy-to-use display module, It can make display easier. Using it can reduce the difficulty of make, so that makers can focus on the core of the work.
We developed the Arduino library for I2C_LCD, user just need a few lines of the code can achieve complex graphics and text display features. It can replace the serial monitor of Arduino in some place, you can get running informations without a computer.
More than that, we also develop the dedicated picture data convert software (bitmap converter)now is available to support PC platform of windows, Linux, Mac OS. Through the bitmap convert software you can get your favorite picture displayed on I2C_LCD, without the need for complex programming.
I2C_LCD can provide you with a very convenient way of make. Enjoy yourself!
Product Version
| Version | How to buy |
|---|---|
| I2C_LCD (With universal Grove cable) |  |
| I2C_LCD (With conversion Grove cable) | |
Features
- Only 2 Arduino pins are occupied (Use I2C interface).
- Supports standard I2C mode (100Kbit/s) and fast I2C mode (400Kbit/s).
- Compatible with multiple communication logic levels: 2.8~5VDC.
- Arduino library supported, use a line of code to complete the display.
- Integrate 7 sizes of ASCll fonts, 5 graphics functions.
- Provide dedicated picture data convert software (Bitmap Converter).
- Most of the complex operation is processed by I2C_LCD independent controller, saving user controller resources.
- Supports cursor function, can set up 16 cursor flicker frequency.
- Supports 128 level backlight lightness adjustment.
- Support 64 level screen contrast adjustment.
- Support device address modification.
- Supports 127 I2C_LCD work in parallel.
- When debugging code, it can take the place of the serial monitor to monitor the program running state.
- Two abnormal recovery methods are provided: reset and restore the factory settings.
- Compatible with Grove interface and 4Pin-100mil interface (under the Grove socket).
- 4 symmetrical fixed hole design for easy user installation.
- China style unique appearance.
Platforms Supported
Arduino Wio BeagleBone Raspberry Pi LinkIt ONE 


Caution
The platforms mentioned above as supported is/are an indication of the module's hardware or theoritical compatibility. We only provide software library or code examples for Arduino platform in most cases. It is not possible to provide software library / demo code for all possible MCU platforms. Hence, users have to write their own software library.
| Arduino | Wio | BeagleBone | Raspberry Pi | LinkIt ONE |
|---|---|---|---|---|
Caution
The platforms mentioned above as supported is/are an indication of the module's hardware or theoritical compatibility. We only provide software library or code examples for Arduino platform in most cases. It is not possible to provide software library / demo code for all possible MCU platforms. Hence, users have to write their own software library.
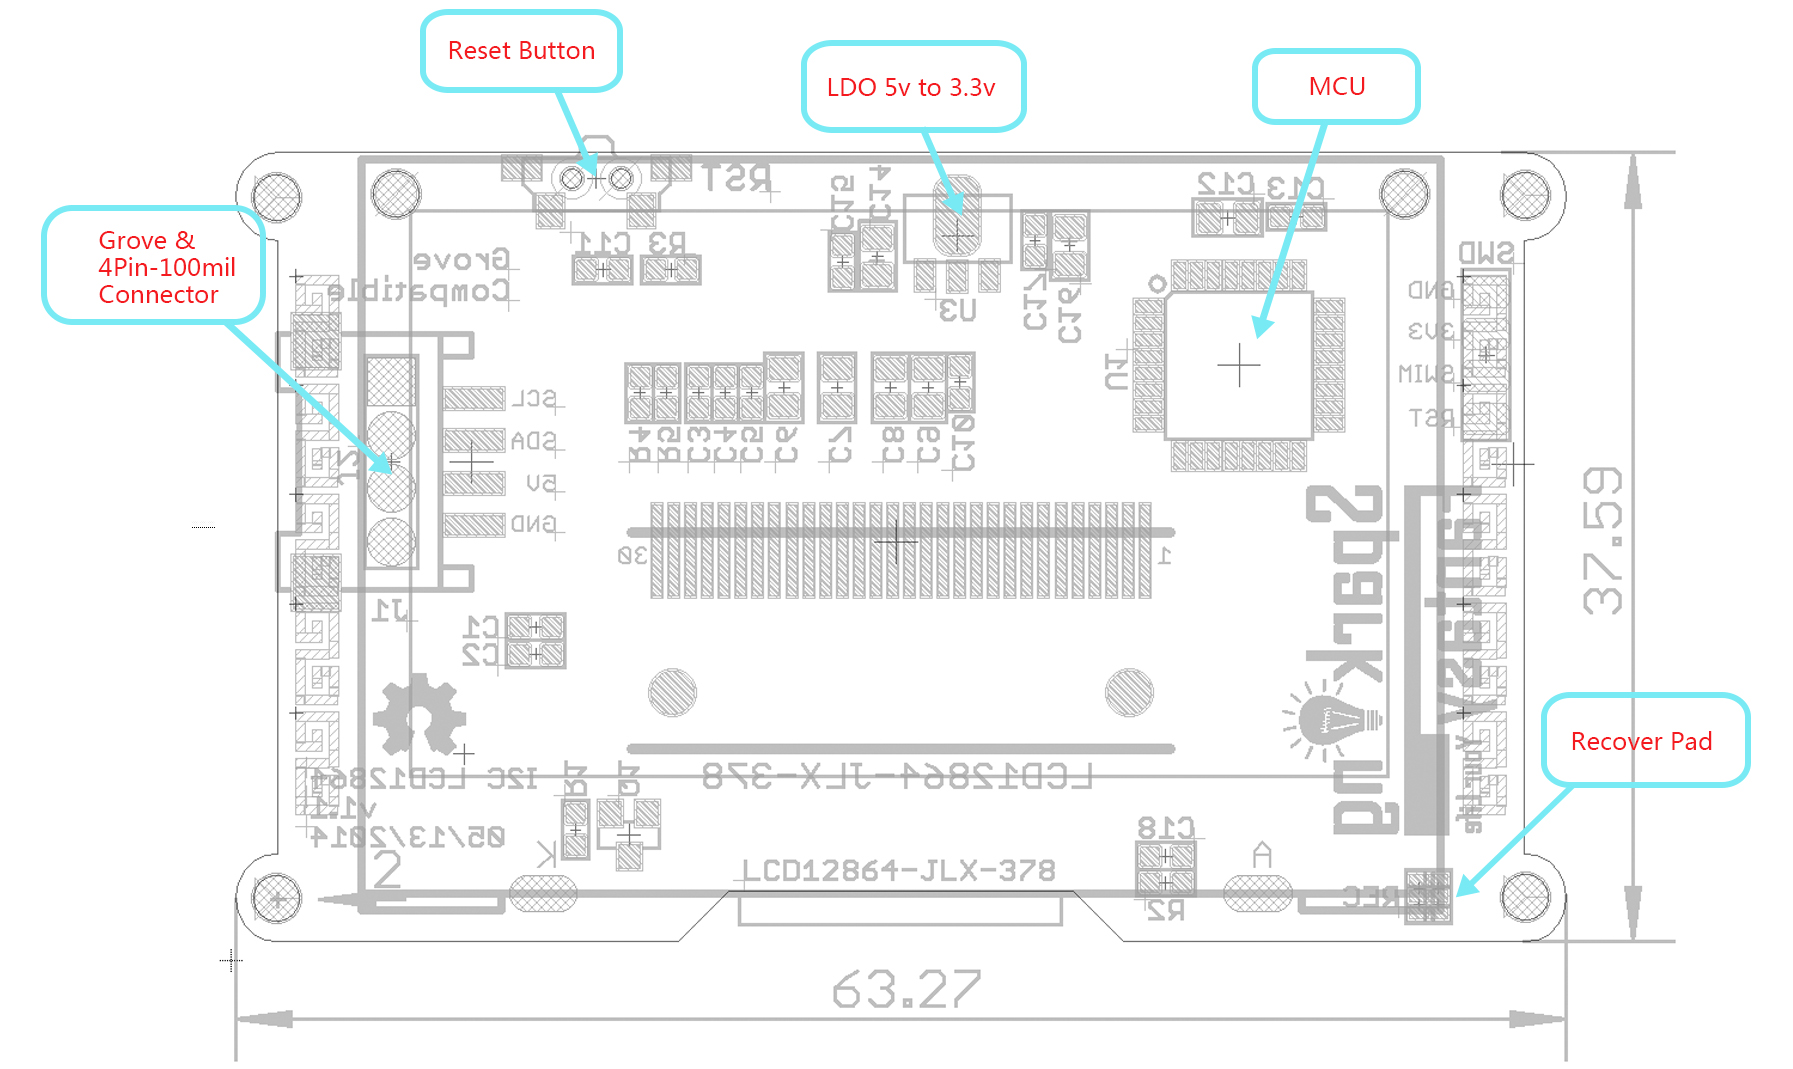
Interface Function
Specification
| Parameter | Value |
|---|---|
| Screen Type | Dual colour LCD |
| Screen Resolution | 128*64 Pixels |
| Screen Active Area (L*W) | 47.1*26.5mm |
| Individual Pixel Size | 0.33*0.33mm |
| Communication Mode | I2C(100Kbit/s and 400Kbit/s) |
| Controller | STM8S005KBT6 |
| Operating Frequency | 16 MHz |
| Weight | 20g |
Electrical Characteristics
| Parameter | Min. | Typical | MNax. | Unit |
|---|---|---|---|---|
| Supply voltage(5V to GND) | 4.5 | 5 | 5.5 | V |
| Logic Voltage(SCL/SDA) | 2.8 | 5 | 5.5 | V |
| HBM ESD | - | 5000 | - | V |
| Temperature | -20 | 25 | 70 | ℃ |
Application Ideas
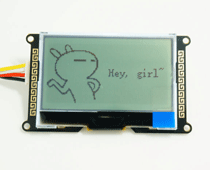
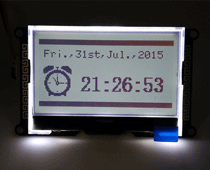
Here is some funny project for your reference.
| Display Picture | Clock With Calendar | Used As Debuger |
|---|---|---|
 |  |  |
| Make it Now | Make it Now | Make it Now |
| Automatic Humidifier | Snake Game |
|---|---|
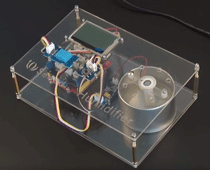 | 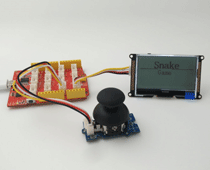 |
| Make it Now | Make it Now |
Getting Started
Step 1: Install the latest version of Arduino IDE to your computer.

Step 2: Download and install the I2C_LCD library to Arduino IDE:
Open Arduino IDE, click Sketch -> Include library -> Add .ZIP library.
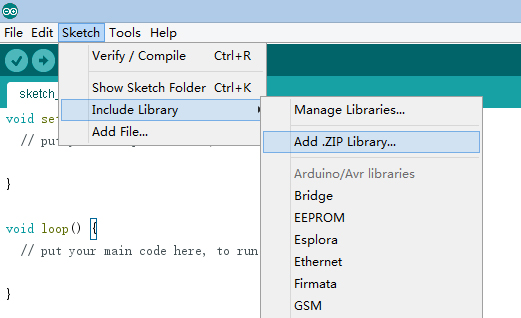
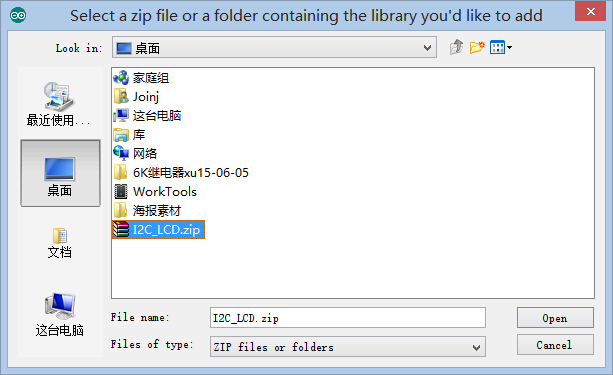
Find and select the I2C_LCD.zip file you just downloaded.
Restart the Arduino IDE.
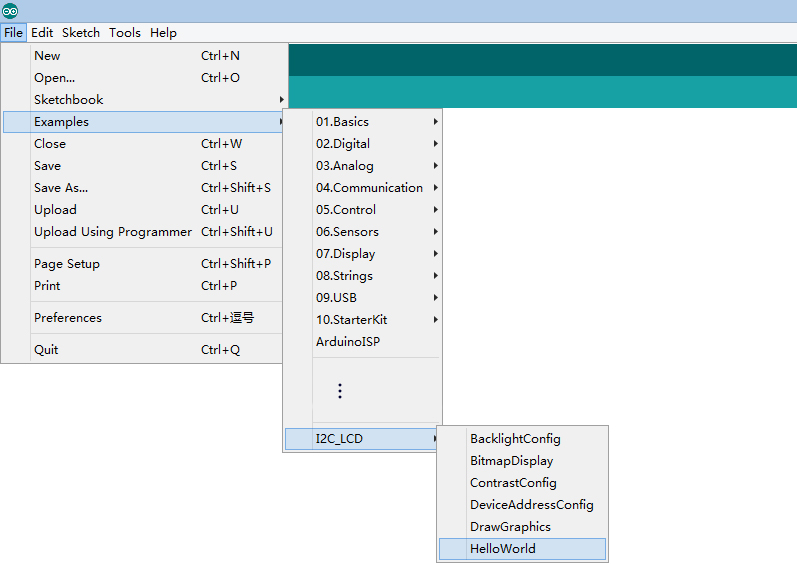
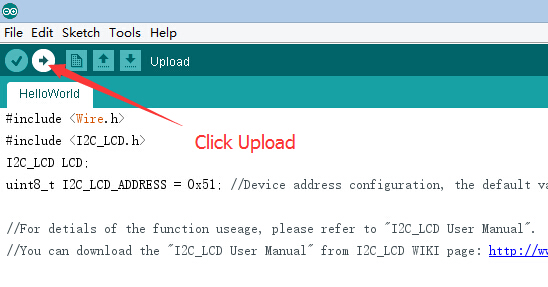
Step 3: Chose the example project which you like. (Take “HelloWorld” project for example here.)
Click File > Examples > I2C_LCD > HelloWorld
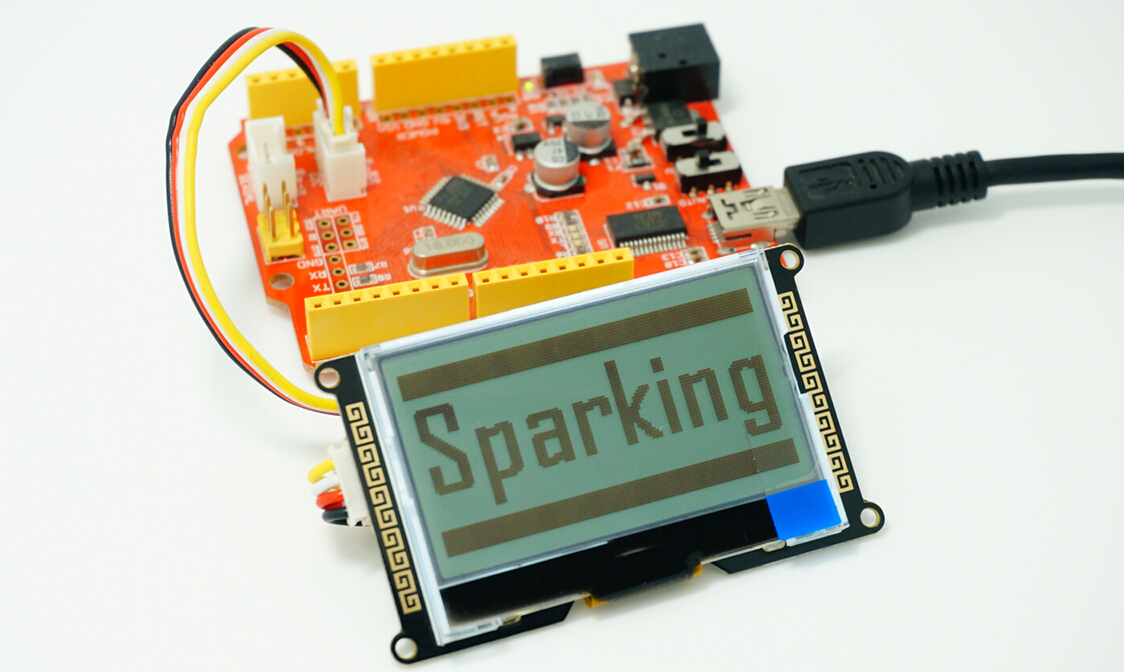
Step 4: Connect I2C_LCD to your Seeeduino Vx board with Grove cable. Then connect Seeeduino Vx board to your computer.
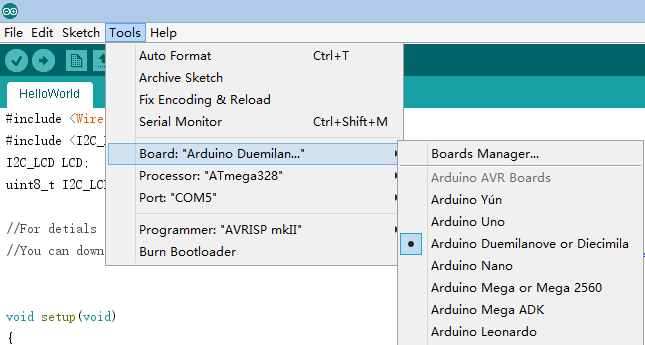
Step 5: Select your board and serial port.
Select the board: Click Tools > Board > “Arduino Duemilanove or Diecimila”(Seeeduino V3.0 Or early version), “Arduino Uno”(Seeeduino Lotus or Seeeduino V4.0).
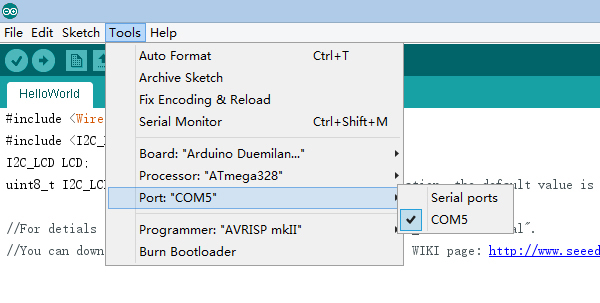
Select the COM: Click Tools -> Serial Port -> COMX(which connected with your board.)
Step 6: Upload the program and enjoy yourself!
PS:
- For more details about library install please refer to http://www.arduino.cc/en/Guide/Liaries.
- If you encounter other problems during the use, please refer to the User Manual for help. If you can’t solve it, please contact us.
Technical support: Joney.s@foxmail.com
Version Tracker
I2C_LCD Hardware:
| Revision | Release Note | Release Date |
|---|---|---|
| I2C_LCD_v1.2 | 1. Add production test point. | Sep 18, 2015 |
| I2C_LCD_v1.1 | 1. Modify the logo position. 2. Modify the board shape. 3. Modify the button position. | May 8, 2014 |
| I2C_LCD_v1.0 | 1. Modify the power circuit wiring. | Mar 1, 2014 |
| I2C_LCD_v0.9b | 1. Initial public release. | Feb 15, 2014 |
I2C_LCD Library:
| Revision | Release Note | Release Date |
|---|---|---|
| I2C_LCD_v1.21 | Support LinkIt boards. | Aug 21, 2016 |
| I2C_LCD_v1.20 | Reorganize I2C_LCD driver interface, make it easy to transplant to any other boards. | Apr 16, 2016 |
| I2C_LCD_v1.12 | Modify the bug that can’t display bitmap when y coordinate is more than 16. | Sep 4, 2015 |
| I2C_LCD_v1.11 | Modify the bug that ‘\t’ can’t print. | Jun 27, 2015 |
| I2C_LCD_v1.10 | 1.Add LCD print function. 2.Edit DeviceAddressConfig example. | Jun 25, 2015 |
| I2C_LCD_v1.0 | Initial public release. | July 6, 2014 |
Resources
Keeping update the latest version.
The repository of Arduino library hosted here, if you have any good idea of the code, you can pull to us.
- I2C_LCD Library
- I2C_LCD User Manual EN
- I2C_LCD User Manual 中文
- BitmapConverter(ForWindows)
- BitmapConverter(ForMacOS)
- BitmapConverter(ForLinux)
- I2C_LCD_SourceFile
Help us make it better
Thank you for choosing Seeed. A couple of months ago we initiated a project to improve our documentation system. What you are looking at now is the first edition of the new documentation system. Comparing to the old one, here is the progresses that we made:
- Replaced the old documentation system with a new one that was developed from Mkdocs, a more widely used and cooler tool to develop documentation system.
- Integrated the documentation system with our official website, now you can go to Bazaar and other section like Forum and Community more conveniently.
- Reviewed and rewrote documents for hundreds of products for the system’s first edition, and will continue migrate documents from old wiki to the new one.
An easy-to-use instruction is as important as the product itself. We are expecting this new system will improve your experience when using Seeed’s products. However since this is the first edition, there are still many things need to improve, if you have any suggestions or findings, you are most welcome to submit the amended version as our contributor or give us suggestions in the survey below, Please don’t forget to leave your email address so that we can reply.
Happy hacking
댓글 없음:
댓글 쓰기